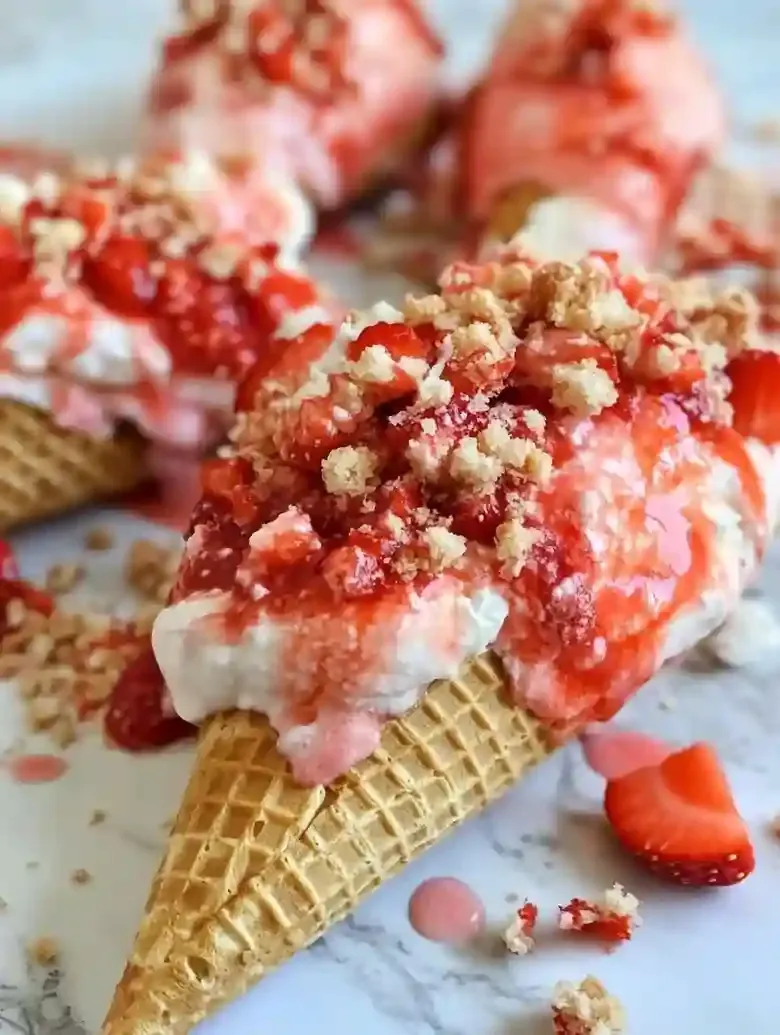
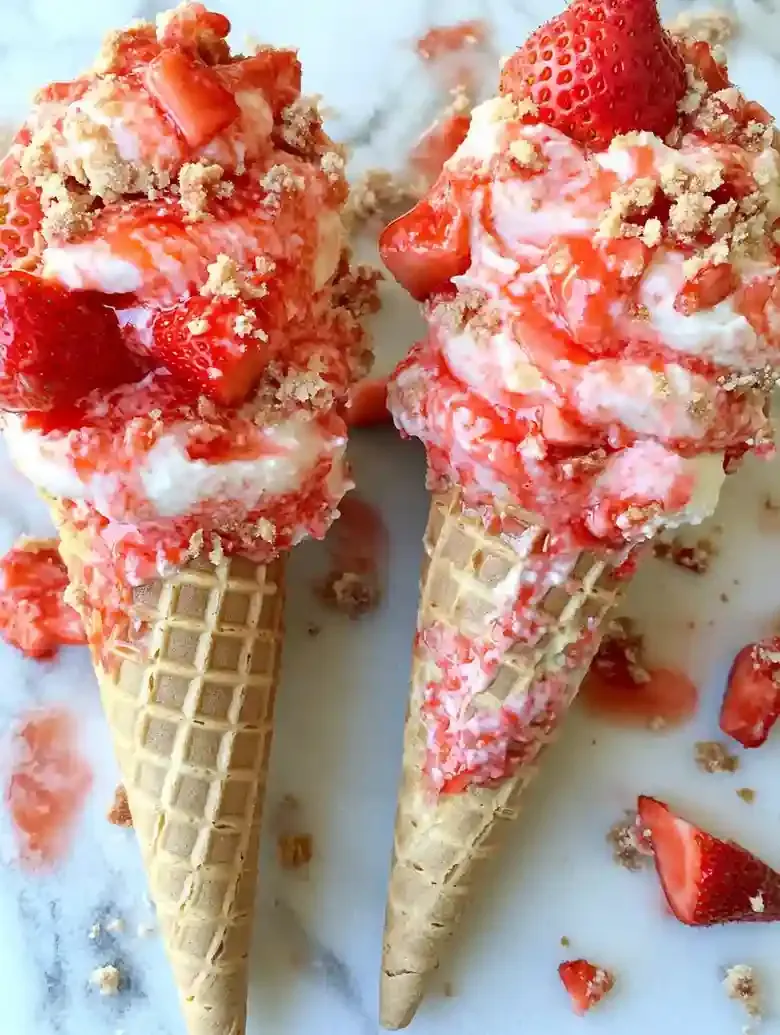
If you’re looking for a fun, no-bake treat, these strawberry crunch cheesecake cones might just be the answer! Soft and creamy on the inside, with a satisfying crunch on the outside, they make a perfect dessert for warm weather.
This recipe focuses on preventing soggy cones, unclear ingredient amounts, lacks substitution options, and misses nutritional data and tips for longer storage and easy preparation.

I remember whipping these up on a busy Saturday afternoon when friends dropped by unexpectedly. I faced a small hiccup with melted chocolate getting clumpy, but I quickly added a splash of coconut oil to smooth it out, but hey, we all have those kitchen moments!
This easy strawberry crunch cheesecake recipe takes just about 20 minutes to prep, and there’s no baking involved, making it super convenient. Once you layer in that creamy filling and top it off with fresh strawberries, you’ll understand why it’s a hit!
If you want a little more inspiration for fruity desserts, check out my Strawberry Shortcake Tiramisu recipe!
Table of contents
Dietary Considerations
- This recipe is not gluten-free due to graham cracker crumbs containing wheat gluten products.
- The recipe contains cream cheese and heavy cream, so it is unsuitable for dairy-free diets.
- The recipe contains cream cheese and heavy cream, so it is unsuitable for vegan diets.
- This recipe does not meet keto or low-carb diets due to sugar and graham cracker crumbs.
- The recipe is nut-free based on the absence of nuts in the ingredient list.
Why You Will Love This Recipe
- Easy Prep Time , With just 20 minutes of prep, you can whip up these strawberry crunch cheesecake cones without any baking. Perfect for busy summer days!
- Refreshing Flavor , The creamy cheesecake filling, combined with fresh strawberries and a crunchy topping, creates a light and refreshing treat ideal for warm weather.
- Creative Serving Option , Serving your dessert in waffle cones adds a fun twist on traditional cheesecake. It’s a unique way to enjoy a classic favorite.
- No Soggy Cones , The white chocolate coating on the cones keeps them from getting soggy, ensuring that every bite maintains its enjoyable crunch for hours after serving.

How to Make Strawberry Crunch Cheesecake Cones
- Prep Time: 20 minutes
- Cool Time:
- Cook Time: None
- Total Time: 20 minutes
- Yield: 6 cones 1x
- Category: dessert
- Method: No Bake
- Diet: Vegetarian
Description
Delicious no-bake Strawberry Crunch Cheesecake Cones with a creamy filling and crunchy topping.
Ingredients
- 6 waffle cones
- 8 oz (225 g) full-fat cream cheese, softened
- 1/2 cup (100 g) fine granulated sugar
- 1 cup (240 ml) heavy cream, cold, for whipping
- 1 teaspoon (5 ml) pure vanilla extract
- 1 cup (100 g) finely crushed graham cracker crumbs
- 4 tablespoons (56 g) unsalted butter, melted slightly
- Fresh strawberries, diced (amount as desired for layering)
- Red food coloring, a drop (optional, for enhancing color)
- White chocolate (amount per package directions for melting and dipping)
- Strawberry glaze (prepared according to linked recipe)
- Strawberry crunch topping (prepared according to linked recipe)
Instructions
- Step 1: Prepare the Glaze: Make your strawberry glaze following the provided recipe. This will add fresh flavor and moisture to the cones, preventing dryness.

- Step 2: Create the Crunch Topping: Prepare the strawberry crunch topping as instructed in the linked recipe. This provides the necessary texture contrast and sweetness.

- Step 3: Melt the Chocolate: Melt the white chocolate according to the package directions. Use low heat and monitor carefully to avoid burning and maintain smoothness. If chocolate hardens too quickly, remelt in 10-second microwave increments until fully melted and smooth.

- Step 4: Dip the Cones: Dip the top portion of each waffle cone into the melted white chocolate. Gently tap off any excess chocolate to avoid mess and ensure neat coating.

- Step 5: Coat with Crunch Topping: Immediately roll the chocolate-coated cone in the strawberry crunch topping until evenly covered. Uniform coating improves appearance and flavor consistency.

- Step 6: Set the Cones: Place the dipped and coated cones on a parchment-lined baking sheet. Allow the chocolate to harden, which generally takes about 10 minutes. Keep cones upright and avoid stacking to prevent sticking.

- Step 7: Prepare the Filling: Scoop your no-bake cheesecake filling into a piping bag or a Ziploc bag with the corner snipped for easier and cleaner filling of the cones.

- Step 8: Layer the Filling: Fill each cone halfway with cheesecake filling. Add a small spoonful of strawberry glaze and a few pieces of diced fresh strawberries on top to build flavor layers and texture contrasts.

- Step 9: Complete the Filling: Fill the remainder of each cone with cheesecake filling, repeating the glaze and strawberry layer. Avoid overfilling to prevent overflow and mess.

- Step 10: Top with Crunch: Sprinkle additional strawberry crunch topping on the filled cones’ tops for decoration and texture.

- Step 11: Drizzle with Chocolate: Using any leftover melted white chocolate, drizzle lightly over the cone tops and add extra strawberry crunch topping to enhance appearance and flavor. Avoid heavy drizzle to prevent overpowering.

- Step 12: Serve or Chill: Serve immediately or refrigerate in an airtight container until ready to serve. Cones are best fresh but can be stored up to 3 days in the fridge to retain crunchiness.

Notes
- Room Temperature: Store cones upright in an airtight container at room temperature up to 1 day. Avoid warm places to prevent melting or sogginess.
- Refrigeration: Store in an airtight container upright in the refrigerator for up to 3 days to keep freshness and crunch.
- Freezing: Wrap cones individually in plastic wrap and place in a freezer-safe container. Freeze up to 1 month. Thaw in the refrigerator before serving.
- If cones become soggy, fill them shortly before serving to maintain texture.
- When white chocolate hardens too quickly during dipping, remelt in short microwave bursts of 10 seconds until smooth.
- If the cheesecake filling is too thick, add milk one tablespoon at a time to achieve desired consistency.
- Use a piping bag for filling cones to reduce mess and improve presentation.
- Press strawberry crunch topping gently onto cones if toppings dislodge before serving.
- Serve with fresh fruit salad or a simple green salad as a fresh contrast.
- Pair with vanilla ice cream or whipped cream for added richness.
- Use leftovers of strawberry glaze, crunch topping, or melted chocolate to top ice cream sundaes, fruit parfaits, cakes, or pancakes.
Nutrition
- Calories: Not provided
- Sugar: Not provided
- Sodium: Not provided
- Fat: Not provided
- Saturated Fat: Not provided
- Unsaturated Fat: Not provided
- Trans Fat: Not provided
- Carbohydrates: Not provided
- Fiber: Not provided
- Protein: Not provided
- Cholesterol: Not provided

Ingredient Notes
- Strawberries: Choose fresh, ripe strawberries for a sweet flavor. Look for ones with a bright color and no blemishes. These are the star of your cones!
- Cream cheese: Use full-fat cream cheese for a rich, creamy texture. Make sure it’s softened for easy mixing; otherwise, your cheesecake won’t blend smoothly!
- Granulated sugar: Opt for fine granulated sugar to add sweetness and help the cream cheese soften better. It’s important for balancing tartness in the strawberries.
- Heavy cream: Go for good quality heavy cream for whipping. It adds lightness to the filling, don’t trade for half-and-half here, as it won’t whip up as nicely.
- Vanilla extract: Use pure vanilla extract for the best flavor. Artificial vanilla lacks richness and depth, which is key for your cheesecake taste.
- Graham cracker crumbs: Choose finely crushed graham crackers for the crust. You can buy them pre-crushed or crush your own for freshness. This adds that beloved crunch and flavor!
- Butter: Use unsalted butter to mix with graham crumbs for a rich flavor and good binding. Melt it slightly to make mixing easier.
- Red food coloring: A drop of red food coloring can enhance the strawberry color, making the filling visually appealing. Use it sparingly for a vibrant yet natural look.
Recipe Tips
- If cones become soggy, fill them just before serving to keep the texture crisp and fresh.
- When the chocolate hardens too quickly, microwave in 10-second increments until fully melted for an easier dipping process.
- If the cheesecake filling is too thick, add a tablespoon of milk at a time until the desired consistency is achieved.
- For a cleaner fill, use a piping bag when adding cheesecake filling into the cone, which prevents messes and ensures better control.
- If topping falls off, lightly press down on the strawberry crunch before serving to secure it in place.
Serving Suggestions
Serve with fresh fruit salad or a simple green salad for contrast. Pair with a scoop of vanilla ice cream or whipped cream for richness.
Use to make ice cream sundaes or fruit parfaits. Add to cakes or as a topping for pancakes.
Top with extra strawberry glaze or melted chocolate for extra sweetness. Sprinkle more strawberry crunch topping for added texture and flavor.
Recipe variations
- You can use vanilla or lemon-flavored no-bake cheesecake filling. Add 1 teaspoon of lemon zest or ½ teaspoon vanilla extract for subtle flavor adjustments in the filling volume.
- Either fresh diced strawberries or freeze-dried strawberry pieces can work for the crunch topping. Add ½ cup strawberry glaze between filling layers for extra moisture and flavor contrast.
- Add chopped nuts such as almonds or pistachios to the strawberry crunch topping, using about ¼ cup. Either chopped or slivered nuts fit well for texture variation.
- You can double the recipe by preparing 12 cones and scaling chocolate coating to 8 ounces. This works well if serving alongside a refreshing drink like Strawberry Cream Frappuccino.
Save This Recipe!
How to Store?
To keep your strawberry crunch cheesecake cones fresh and delicious, follow these storage tips:
Room Temperature: Store cones upright in an airtight container up to 1 day. Avoid warm areas to prevent melting or sogginess.
Refrigeration: Place cones in an airtight container in the refrigerator up to 3 days. Keep upright to retain crunchiness and freshness.
Freezing: Wrap cones individually in plastic wrap, then place in a freezer container up to 1 month. Thaw in the refrigerator before serving.
Other Recipes You’ll Love
- Toasted Coconut Marshmallows
- Puff Pastry Apple Rosettes
- Rhubarb and Strawberry Tart Recipe
- Chocolate Peanut Clusters
If you enjoyed this Strawberry Crunch Cheesecake Cones or any other recipe on my blog, please leave a ⭐ star rating and let me know how it went in the comments below. I appreciate taking time to read about this recipe, thank you!
