
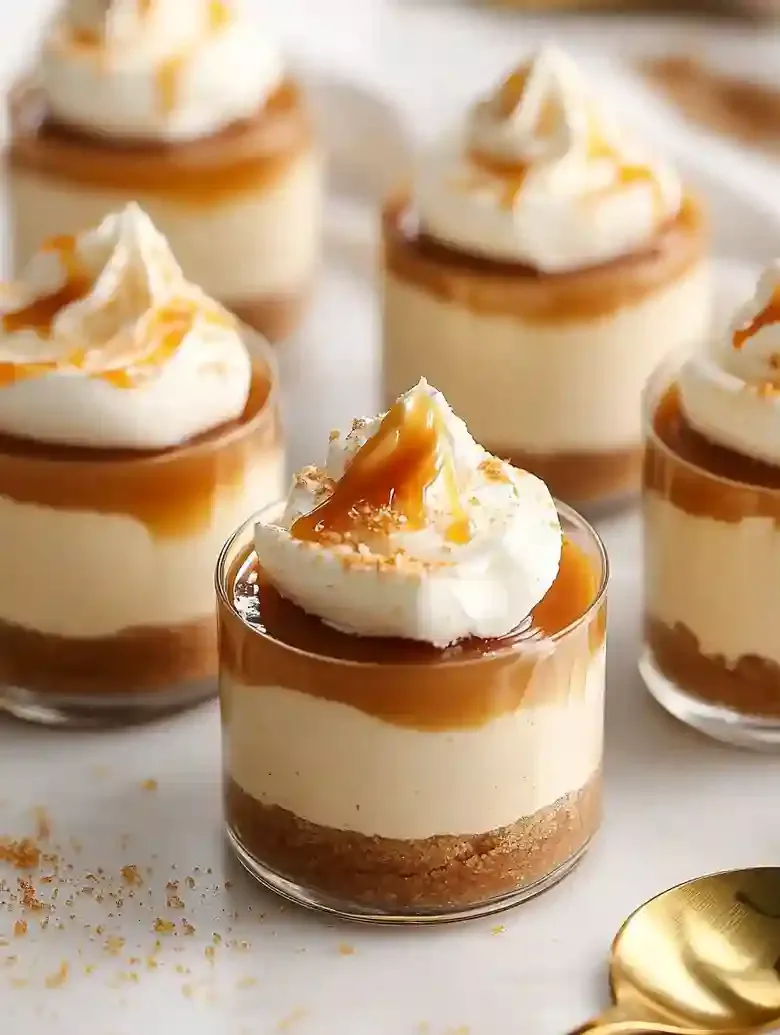
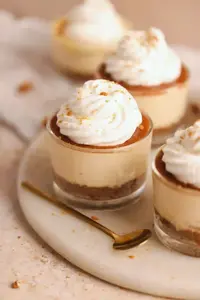
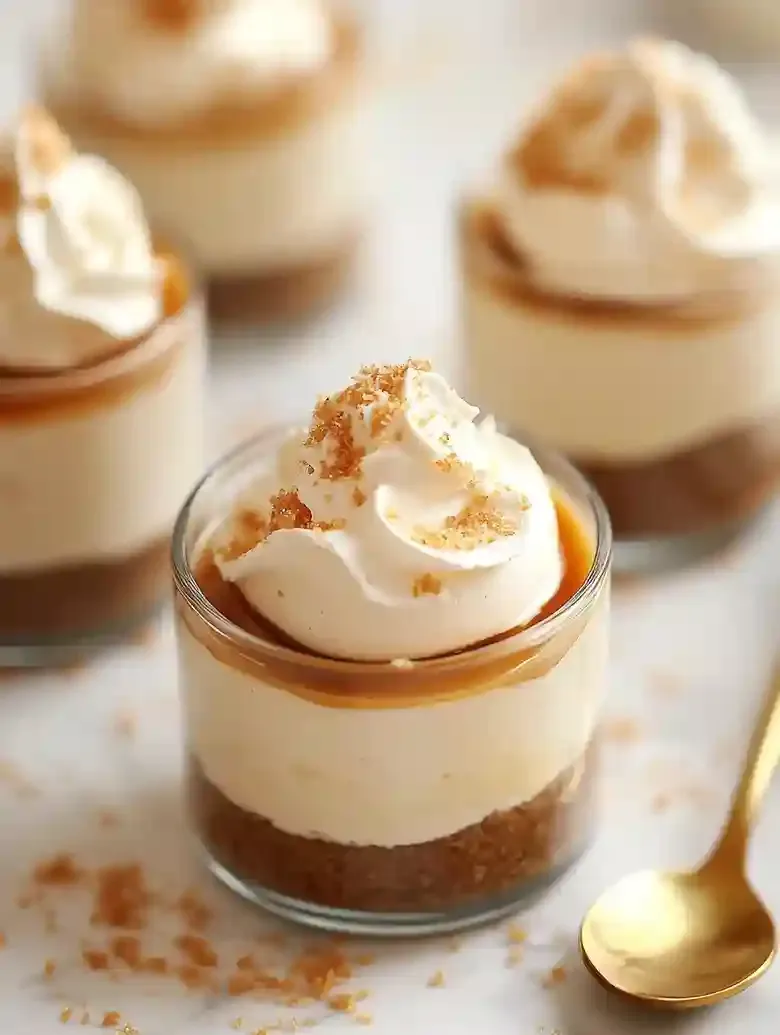
These salted caramel cheesecake cups are a dreamy treat that’s as easy to make as it is satisfying. With a creamy cheesecake filling layered over a crunchy crust, every spoonful feels like a celebration.
This recipe tackles the challenges of overly complicated processes and bland flavors often seen in similar dessert cups, making it approachable and delicious.
I know the struggle of wanting to impress friends with dessert but not wanting to spend hours in the kitchen. Not to mention, making caramel can be tricky. Thankfully, this recipe skips that hassle, no baking required and no complicated steps.
This recipe manages to create a beautifully rich dessert in just about 30 minutes of prep, requiring only a few hours to chill. As it firms up, the layers will meld together, resulting in delightful textures that are a joy to eat.
If you love easy desserts that look and taste amazing, you need to check out my Strawberry Crunch Cheesecake.
Table of contents
Why You Will Love This Recipe
- Decadent Flavor Experience The rich cream cheese filling melds beautifully with the salted caramel, creating a satisfying blend of sweet and salty that truly stands out. Each bite is a delightful surprise that keeps you coming back for more.
- Effortless Preparation With just 30 minutes of prep time, making these cheesecake cups is a breeze. You can whip up the filling and crust quickly, putting them in the fridge to chill while you take a break.
- Impressive Presentation These cheesecake cups are not only delicious, but also look great when served. Layering the ingredients in small cups allows for a beautiful showcase of the creamy filling, crust, and luscious caramel drizzle on top.
- Long-Lasting Freshness Thanks to its chilled nature, these salted caramel cheesecake cups stay fresh in the fridge for days, making them an ideal make-ahead dessert. You’ll find they remain just as tasty, allowing for less stress when entertaining.

No Bake Salted Caramel Cheesecake Cups
- Prep Time: 30 minutes
- Cool Time: 4-6 hours
- Cook Time: 15 minutes
- Total Time: 5-6 hours 45 minutes
- Yield: 6 servings 1x
- Category: dessert
- Method: No Bake
- Cuisine: American
- Diet: Vegetarian
Description
Delicious no-bake salted caramel cheesecake cups with a creamy filling and a crunchy crust, perfect for dessert lovers.
Ingredients
- 200g (7 oz) Biscoff cookies
- 6 tbsp (85g) unsalted butter, melted
- 16 oz (450g) cream cheese, room temperature
- ⅓ cup (67g) granulated sugar
- 1 tsp (5ml) vanilla extract
- ⅓ cup (80ml) salted caramel sauce (prepared from scratch or melted Werther’s Original caramels)
- ⅔ cup (160ml) heavy cream, chilled
- 1 cup (240ml) heavy cream, chilled, whipped for topping (optional)
Instructions
- Step 1: Prepare Your Caramel Sauce (Optional): If making caramel sauce from scratch, add ¾ cup granulated sugar to a wide-bottomed pan over low flame. Stir continuously to avoid burning sugar. Once melted to a golden brown, remove from heat and slowly stir in ⅓ cup heavy cream and a pinch of salt. Let cool completely before use. Alternatively, melt 20 Werther’s Original chewy caramels with ⅓ cup heavy cream over low heat until smooth and combined, then cool.

- Step 2: Prepare Your Crust: Crush Biscoff cookies into fine crumbs using a food processor or by placing them in a sealed plastic bag and crushing with a rolling pin. Mix crumbs with melted unsalted butter until evenly coated. Divide the mixture evenly among 6 serving cups. Press gently into the bottom of each cup, taking care not to over-pack the crust to allow it to set properly.
- Step 3: Whip Cheese Mixture: In a mixing bowl, beat cream cheese using a hand or stand mixer until smooth and creamy. Add granulated sugar and vanilla extract and continue to beat until fully incorporated and no lumps remain.
- Step 4: Incorporate Heavy Cream: Slowly pour chilled heavy cream into the cream cheese mixture. Whip on medium-high speed until medium peaks form—when the peaks hold their shape but the cream is still soft and smooth. Avoid over-whipping to prevent a grainy texture.
- Step 5: Add Caramel Sauce: Gently fold in one-third cup of prepared salted caramel sauce using a spatula. Fold carefully just to create marbled swirls of caramel within the filling; do not fully mix to maintain a pretty presentation.
- Step 6: Chill Thoroughly: Spoon the cheesecake filling evenly over the prepared crusts in the serving cups. Cover and refrigerate for 4 to 6 hours to allow the cheesecake to firm up and flavors to meld. Longer chilling time improves texture and taste.
Notes
- Room Temperature: Store in an airtight container at room temperature for up to 1 day. After that, refrigeration is recommended to maintain freshness.
- Refrigeration: Keep the cheesecake cups covered in an airtight container in the refrigerator for up to 5 days to prevent odor absorption and moisture loss.
- Freezing: Wrap cups individually with plastic wrap, place in a freezer-safe container, and freeze for up to 2 months. Thaw overnight in the refrigerator before serving.
- If cheesecake mixture is too thick, add 1 tablespoon of heavy cream while mixing to achieve a smoother consistency.
- If crust crumbles instead of holding together, add 1 tablespoon melted butter to improve binding.
- If caramel sauce is grainy, gently reheat over low heat, stirring constantly for 5 minutes until smooth.
- For loose cheesecake filling, chill for an additional hour to help it firm up.
- If cheesecake cups do not peel smoothly from serving cups, refrigerate an additional 30 minutes before serving.
- Use full-fat cream cheese softened to room temperature for the best texture and flavor.
Nutrition
- Serving Size: 1 cup
- Calories: 510
- Sugar: 39g
- Sodium: 260mg
- Fat: 37g
- Saturated Fat: 23g
- Unsaturated Fat: 8g
- Trans Fat: 0g
- Carbohydrates: 40g
- Fiber: 1g
- Protein: 6g
- Cholesterol: 115mg
Ingredient Notes
- Cream cheese: Choose full-fat cream cheese for the best flavor and creamy texture. Make sure it’s softened to mix easily; this avoids lumps in the filling.
- Caramel sauce: Use a good quality salted caramel sauce that’s smooth and rich. It adds a deep flavor that balances the cheesecake and provides that delicious, gooey element.
- Butter: I suggest unsalted butter for this recipe to control the saltiness. It brings richness and helps create a smooth crust, so make sure it’s melted and slightly cooled.
- Graham cracker crumbs: Look for finely crushed graham cracker crumbs to ensure a nice, even crust. You can make your own by crushing whole crackers; just make sure they measure out properly!
- Heavy cream: Use cold heavy cream for whipping. It’s important for achieving the right fluffy texture for the cheesecake filling. Chill your bowl and beaters for the best results!
- Powdered sugar: This adds sweetness without grittiness, giving a nice smooth texture to the filling. Sift it before using to avoid lumps for a cleaner mix.
Recipe Tips
- If your cheesecake mixture is too thick, add 1 tablespoon heavy cream while mixing to achieve a smoother consistency.
- When your crust crumbles instead of holding together, add 1 tablespoon melted butter for better binding.
- If caramel sauce is too grainy, gently reheat over low heat, stirring constantly, until smooth for 5 minutes.
- For loose cheesecake filling, chill for an additional hour in the fridge to help it set more firmly.
- If the cheesecake cups do not peel off smoothly from the cups, refrigerate them for another 30 minutes before serving.
Serving Suggestions
Serve the salted caramel cheesecake cups with fresh berries or a dollop of whipped cream. For variety, pair them with chocolate-covered strawberries or banana slices for added flavor.
Use the cheesecake filling to make layered parfaits with granola or as a topping for gluten-free brownies. Add to fresh fruit salads for a creamy twist or incorporate into gluten-free pie crusts.
Top with chocolate ganache or a drizzle of additional salted caramel sauce for richness. A sprinkle of toasted nuts or sea salt enhances the presentation and flavor profile.
Recipe variations
- You can use graham cracker crumbs instead of Biscoff cookies for the crust, maintaining 200g and mixing with 6 tbsp melted unsalted butter for binding consistency.
- Add 1 tsp cinnamon or ¼ tsp sea salt to the caramel sauce to adjust the flavor, gently warming the sauce to activate these spices evenly throughout the cheesecake filling.
- Either homemade salted caramel sauce or 20 Werther’s Original Chewy Caramels melted with ¼ cup heavy cream can be used as the caramel base for the filling’s smooth texture.
- If preparing for a larger group, multiply all ingredients by two for 12 cups, chilling the cheesecake cups an extra hour to ensure proper setting; this works well alongside a drink like Caramel Brulee Latte.
Save This Recipe!
How to Store?
To keep your no bake salted caramel cheesecake cups fresh and delicious, follow these storage tips:
Room Temperature: Store in an airtight container at room temperature up to 1 day to maintain texture before refrigeration is recommended.
Refrigeration: Place in an airtight container and refrigerate for up to 5 days; keep covered to prevent odor absorption and moisture loss.
Freezing: Wrap cups with plastic wrap, place in a freezer container and freeze up to 2 months. Thaw overnight in the refrigerator before serving.
Other Recipes You’ll Love
If you enjoyed this salted caramel cheesecake cups or any other recipe on my blog, please leave a ⭐ star rating and let me know how it went in the comments below. I appreciate taking time to read about this recipe, thank you!