
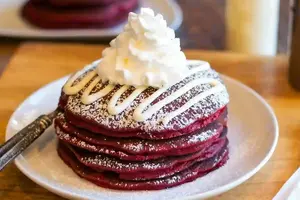
These red velvet pancakes are not just a pretty breakfast; they’re fluffy, rich, and perfect for special occasions. With their signature vibrant hue and a hint of cocoa, they’re a delightful twist on classic pancakes.
This pancake recipe tackles density and insufficient fluffiness commonly found in breakfast pancakes, delivering a lighter, more appealing texture for morning meals.

I remember the first time I attempted to make them; the batter was a bit runny, and they ended up looking less than perfect (but they still tasted amazing!). Each bite brings a cozy sweetness that brightens any busy weekend morning or impresses guests unexpectedly popping by.
This recipe turns out light and fluffy pancakes in just 30 minutes, allowing you to whip them up easily. They’re definitely a crowd favorite for brunch, and your kitchen will smell fantastic while they’re cooking!
If you want to try a fun twist on the typical pancake routine, check out my Broccolini Frittata for a savory option that’s equally enjoyable!
Table of contents
Why You Will Love This Recipe
- Fluffy Texture , These red velvet pancakes are not just pretty; they boast a light, airy texture that makes each bite feel luxurious. The right combination of buttermilk and whipped egg whites gives them a soufflé-like fluffiness that’s simply irresistible.
- Unique Flavor Profile , The addition of cocoa powder alongside buttermilk creates a subtle but distinct chocolate undertone, perfectly complementing the sweet, buttery notes. This makes them stand out and adds a surprising twist to your typical pancake experience.
- Visual Appeal , The vibrant red hue of these pancakes instantly catches the eye, making them a showstopper for breakfast or brunch. Their striking appearance not only elevates your dining table but also sets the stage for memorable moments with friends and family.
- Long-lasting Freshness , Unlike many traditional pancakes, these red velvet pancakes stay moist and delicious even after cooling. They can be stored in the fridge for a couple of days or frozen for future enjoyment, making breakfast or brunch planning a breeze.

Red Velvet Pancakes
- Prep Time: 10 minutes
- Cool Time:
- Cook Time: 20 minutes
- Total Time: 30 minutes
- Yield: 4 servings 1x
- Category: Breakfast
- Method: Pan-frying
- Cuisine: American
- Diet: Vegetarian
Description
Deliciously fluffy red velvet soufflé pancakes perfect for brunch or dessert.
Ingredients
- 1 ½ cups (192 g) all-purpose flour
- 2 tablespoons (25 g) granulated sugar
- 1 tablespoon (7.5 g) unsweetened cocoa powder
- 1 teaspoon (4 g) baking powder
- ½ teaspoon (2 g) baking soda
- ½ teaspoon (3 g) salt
- 1 cup (240 ml) buttermilk
- 2 large eggs
- ¼ cup (56 g) unsalted butter, melted
- 1 teaspoon (5 ml) vanilla extract
- 1 tablespoon (15 ml) red food coloring (gel recommended)
- Softened cream cheese, for spreading
Instructions
- Step 1: Sift or whisk together the all-purpose flour, granulated sugar, cocoa powder, baking powder, baking soda, and salt in a large mixing bowl until fully combined and smooth. Sifting helps create a smoother batter and fluffier pancakes.

- Step 2: In a separate bowl, whisk the buttermilk, eggs, melted butter, vanilla extract, and red food coloring together until blended. Stir gently to avoid overmixing, which can affect the pancakes’ light, airy texture.
- Step 3: Pour the wet ingredients into the bowl with the dry ingredients. Stir with a whisk or spatula until just combined. Do not overmix; it is normal for some lumps to remain. Overmixing causes tough pancakes, so stop mixing when you still see a few small lumps in the batter.
- Step 4: Preheat your griddle or frying pan to a temperature between 350°F and 375°F (175°C to 190°C). A properly heated surface helps ensure even cooking and promotes formation of air pockets for those fluffy pancakes. Lightly grease the surface with non-stick spray or an extra teaspoon of melted butter for easier flipping.
- Step 5: Using about ¼ cup (60 ml) of batter per pancake, pour the batter onto the hot griddle. This amount sizes the pancakes for even cooking and a satisfying fluffy texture as they rise.
- Step 6: Cook the pancakes for 2 to 3 minutes until bubbles appear on the surface and the edges begin to look set and dry. These visual cues indicate it is time to flip so the pancakes cook evenly without burning.
- Step 7: Flip each pancake and cook for an additional 1 to 2 minutes until cooked through and both sides are golden in color. Lower the heat to medium-low if the edges brown too quickly before the pancakes finish cooking inside.
Notes
- Room Temperature: Store cooled pancakes in an airtight container at room temperature for up to 2 days to maintain softness and flavor.
- Refrigeration: Place pancakes in an airtight container in the refrigerator for up to 5 days. Reheat gently before serving.
- Freezing: Wrap pancakes individually in plastic wrap. Store in a freezer-safe container or bag for up to 2 months. Thaw overnight in the refrigerator or at room temperature.
- Use fresh baking powder to ensure the pancakes rise properly; expired leavening agents reduce fluffiness.
- If pancakes stick to the griddle, apply non-stick spray or melt an extra teaspoon of butter on the cooking surface before cooking.
- For extra fluffiness, gently fold in whipped egg whites 2-3 minutes after mixing the batter, just before cooking.
- Stop mixing the batter as soon as you see a few lumps (usually after about 1 minute) to prevent overdeveloping gluten, which leads to dense pancakes.
- Adjust heat if outer edges brown before the center is cooked by lowering to medium-low heat about 3 minutes into cooking.
Nutrition
- Serving Size: 1 pancake
- Calories: Not specified
- Sugar: Not specified
- Sodium: Not specified
- Fat: Not specified
- Saturated Fat: Not specified
- Unsaturated Fat: Not specified
- Trans Fat: Not specified
- Carbohydrates: Not specified
- Fiber: Not specified
- Protein: Not specified
- Cholesterol: Not specified
Ingredient Notes
- All-purpose flour: Go for a good quality all-purpose flour for that classic pancake texture. It helps give the pancakes structure and fluffiness.
- Sugar: Regular granulated sugar works best here. It balances the cocoa and enhances overall flavor. Avoid brown sugar to keep that bright red color.
- Cocoa powder: Use unsweetened cocoa powder for that rich chocolate taste. It’s essential for the red velvet flavor without adding too much sweetness. Dutch-processed cocoa can alter the color, so stick with natural.
- Baking powder: Make sure it’s fresh for the best rise. It’s key for achieving that light and airy pancake texture.
- Egg: One large egg at room temperature helps bind everything together and adds moisture. It’ll make the pancakes fluffier, too!
- Buttermilk: Adds a tangy flavor and ensures the pancakes are tender. If you’re out, mix regular milk with a tablespoon of vinegar to make your own.
- Red food coloring: Use gel food coloring for vibrant red pancakes; it’s concentrated and won’t water down the batter. Liquid coloring can affect the batter’s texture.
- Butter: Melted unsalted butter gives richness and moisture. You can also use oil for a dairy-free option, but butter adds a lovely flavor.
- Vanilla extract: A splash of pure vanilla extract elevates the flavor profile. Don’t skimp on this, it balances the cocoa taste beautifully!
- Cream cheese: For serving, use a softened cream cheese to spread on top. It adds that classic red velvet pairing of tanginess and creaminess!
Recipe Tips
- If pancakes are not rising properly, check your baking powder’s expiration date to ensure freshness before adding 1 teaspoon to your dry ingredients.
- When pancakes stick to the griddle, use a non-stick spray or melt an extra teaspoon of butter on the cooking surface beforehand.
- If pancakes appear too dense, gently fold in beaten egg whites for added fluffiness just before cooking, incorporating them 2-3 minutes after mixing the batter.
- If the outer edges brown too quickly, lower the heat to medium-low 3 minutes into cooking to allow the interior to cook properly without burning.
- When mixing batter, stop as soon as you see a few lumps, typically after 1 minute, to prevent overmixing which leads to tough pancakes.
Serving Suggestions
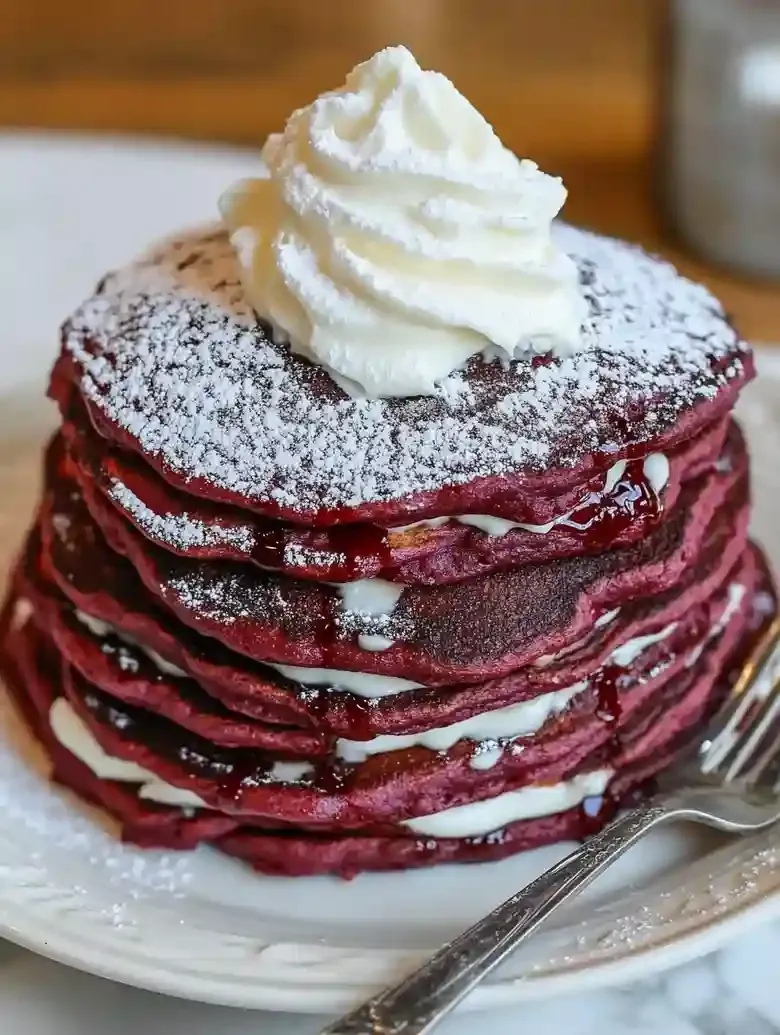
Serve with whipped cream or cream cheese frosting to enhance the sweetness of the red velvet pancakes. You can also include fresh strawberries or blueberries to add a fruity touch.
Use to make red velvet pancake sandwiches or red velvet pancake stack cakes for brunch. Add to dessert bars or layer with mascarpone cheese for added richness.
Top with chocolate syrup or vanilla sauce for an extra layer of flavor. A dusting of powdered sugar can also make for a lovely presentation.
Recipe variations
- You can use cake flour instead of all-purpose flour for lighter pancakes. Cake flour has less protein, which creates an airier texture in the batter.
- Add 2 teaspoons of espresso powder to the dry ingredients to deepen chocolate flavor and complement the cocoa powder. One teaspoon can also be used for a subtler taste.
- Either buttermilk or plain yogurt can be used as the liquid base. Yogurt should be thinned with a tablespoon of milk for a similar texture and tang.
- Scale the recipe up by doubling all ingredients for 8 servings. Adjust cooking time by adding 1-2 minutes per batch due to larger quantity.
Save This Recipe!
How to Store?
To keep your red velvet pancakes fresh and delicious, follow these storage tips:
Room Temperature: Place cooled pancakes in an airtight container at room temperature up to 2 days to maintain softness and flavor.
Refrigeration: Store pancakes in an airtight container in the refrigerator for up to 5 days. Reheat gently before serving.
Freezing: Wrap pancakes individually in plastic wrap, place in a freezer-safe container or freezer bag for up to 2 months. Thaw overnight in the refrigerator or at room temperature.
Other Recipes You’ll Love
If you enjoyed this red velvet pancakes or any other recipe on my blog, please leave a ⭐ star rating and let me know how it went in the comments below. I appreciate taking time to read about this recipe, thank you!