
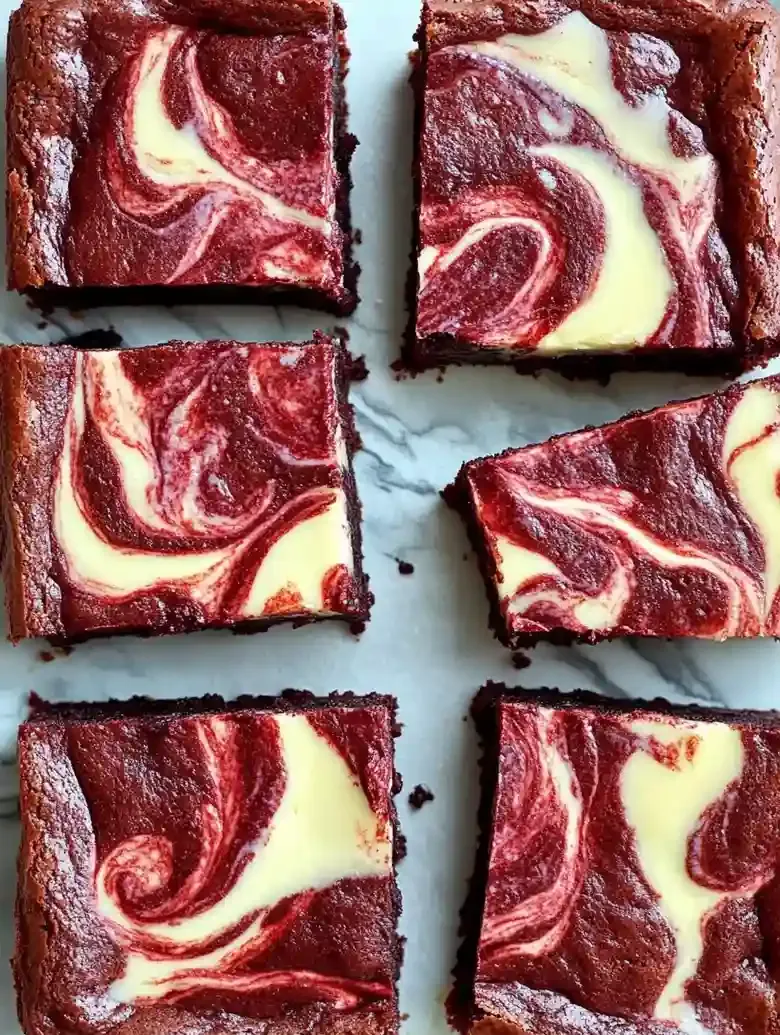
These red velvet cheesecake brownies are a scrumptious combination of rich flavors, perfect for Valentine’s Day. With a vibrant color and delicious cheesecake swirl, they’ll brighten up any dessert table!
This recipe addresses challenges of dryness, overwhelming flavors, and difficulty achieving a pleasing texture often found in traditional brownie and cheesecake combinations.
I remember the first time I tried making these brownies. They turned out too cakey for my liking, and I wanted that soft, fudgy texture. This recipe fixes that by combining the best of both worlds: a moist brownie base with a creamy cheesecake filling that won’t let you down.
What makes this recipe truly shine is how simple it is. In just 15 minutes of prep and 30 minutes of baking, you can create a treat that’s far more impressive than those box mixes, filling your kitchen with the delightful smell of chocolate and cream cheese.
If you’re interested in another treat that’s easy to whip up for special occasions, you might want to try my Protein Brownies.
Table of contents
Why You Will Love This Recipe
- Satisfying Texture The combination of fudgy brownie and creamy cheesecake filling creates a rich dessert that strikes a fantastic contrast in every bite.
- Eye-Catching Color The vibrant red hue from the food coloring makes these brownies visually appealing, making them a show-stopping addition to any celebration.
- Easy Make-Ahead Option These brownies keep well in the fridge, allowing you to bake them a day or two in advance for stress-free entertaining on special occasions.
- Great for Sharing Cut into playful squares for a fun treat at parties or potlucks, these red velvet cheesecake brownies are sure to attract attention and smiles.

Red Velvet Cheesecake Brownies
- Prep Time: 15 minutes
- Cool Time:
- Cook Time: 30 minutes
- Total Time: 45 minutes
- Yield: 12 servings 1x
- Category: dessert
- Method: Baking
- Diet: Vegetarian
Description
Delicious red velvet cheesecake brownies that are perfect for Valentine’s Day or any special occasion.
Ingredients
- 8 tablespoons (113 g) unsalted butter, melted
- 1 cup (200 g) granulated sugar
- 1/4 cup (21 g) unsweetened cocoa powder, preferably Dutch-process
- 1/2 teaspoon vanilla extract
- 1 tablespoon gel-based red food coloring
- 1/8 teaspoon salt
- 1/2 teaspoon white vinegar
- 2 large eggs, whisked separately
- 3/4 cup (91 g) all-purpose flour, scooped and leveled
- 1 (8-oz. / 226 g) package full-fat cream cheese, softened
- 3 tablespoons (38 g) granulated sugar
- 1/2 teaspoon vanilla extract
- 1 large egg yolk
Instructions
- Step 1: Preheat the oven to 350ºF (177ºC) to ensure even baking and desired texture.

- Step 2: Line an 8×8 inch (20×20 cm) baking pan with parchment paper. Lightly grease the parchment with butter to prevent sticking and make removal easier after baking.
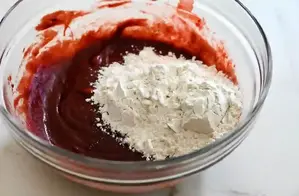
- Step 3: In a large bowl, combine the melted butter, sugar, unsweetened cocoa powder, vanilla extract, gel-based red food coloring, and salt. Stir together until fully combined to create the rich brownie base.
- Step 4: Stir in the white vinegar into the batter. In a separate small bowl, whisk the two eggs until combined, then pour and stir them into the brownie mixture. The vinegar enhances the red color and activates the leavening.
- Step 5: Gently fold the all-purpose flour into the wet mixture just until no white streaks of flour remain. Avoid overmixing to keep the batter tender and moist. The finished batter should look smooth.
- Step 6: In a stand mixer or with handheld beaters, blend the softened cream cheese, sugar, vanilla extract, and egg yolk on medium speed until smooth and fully combined. If lumpy, mix for an additional minute.
- Step 7: Spread half of the brownie batter evenly into the prepared pan. Then spread the cheesecake filling evenly over the brownie layer, forming a smooth layer.
- Step 8: Place dollops of the remaining brownie batter over the cheesecake filling. It is not necessary to spread perfectly as this will be swirled in the next step.
- Step 9: Using a knife or toothpick, gently swirl the brownie batter and cheesecake filling together to create a marbled effect. Do not over-swirl to maintain distinct layers and attractive patterning.
- Step 10: Bake in the preheated oven for 30 minutes. The brownies are done when the edges are set and the center appears slightly puffed. If the cheesecake layer seems to sink or is not set, continue baking for an additional 5 minutes, checking closely. Allow the brownies to cool completely in the pan before lifting out the parchment and slicing.
Notes
- Room Temperature: Store in an airtight container at room temperature for up to 2 days, away from direct sunlight to prevent drying.
- Refrigeration: Keep in an airtight container in the refrigerator for up to 5 days. Ensure brownies are completely cooled before sealing to avoid condensation.
- Freezing: Wrap brownies tightly in plastic wrap and place in a freezer-safe container for up to 3 months. Thaw at room temperature before serving.
- If the brownie batter is too thick when combining ingredients, add 1 tablespoon of water at a time until the desired consistency is reached.
- For a smoother cheesecake filling, blend on medium speed for a full minute if lumpy after initial mixing.
- To prevent sticking, grease the parchment paper lightly before adding batter.
- To deepen chocolate flavor, optionally add 1/4 cup (43 g) chocolate chips into the brownie batter before baking.
- Gently fold in flour to avoid tough brownies; the batter should be smooth but not overmixed.
Nutrition
- Calories: Not specified
- Sugar: Not specified
- Sodium: Not specified
- Fat: Not specified
- Saturated Fat: Not specified
- Unsaturated Fat: Not specified
- Trans Fat: Not specified
- Carbohydrates: Not specified
- Fiber: Not specified
- Protein: Not specified
- Cholesterol: Not specified

Ingredient Notes
- Cocoa powder: Go for high-quality unsweetened cocoa powder. It gives a rich chocolate flavor that’s key to the brownies. Dutch-process works great for a deeper color.
- Red food coloring: Choose a gel-based red food coloring for vibrant and consistent color. Liquid coloring can dilute the batter, affecting texture and taste.
- Cream cheese: Opt for full-fat cream cheese for a rich, creamy texture in the cheesecake layer. Make sure to soften it beforehand for easy mixing.
- Sugar: A blend of granulated and brown sugar works best. Brown sugar adds moisture and a slight chewiness to the brownies!
- All-purpose flour: Use standard all-purpose flour for the best structure. Avoid using too much; it can make the brownies dry. Scoop and level it for accuracy.
Recipe Tips
- If the brownie batter seems too thick when combining ingredients, add 1 tablespoon of water at a time until the desired consistency is reached.
- When the cream cheese mixture appears lumpy after mixing, blend on a medium speed for another minute to achieve a smooth texture.
- If the cheesecake layer sinks or doesn’t set properly, bake the brownies for an additional 5 minutes, checking until the edges are slightly puffed.
- For a richer chocolate flavor, consider adding 1/4 cup of chocolate chips to the brownie batter before pouring it into the pan for baking.
- If the batter is sticking to the parchment paper, lightly grease it with butter before pouring in the brownie mixture to prevent sticking.
Serving Suggestions
Serve red velvet cheesecake brownies with vanilla ice cream or whipped cream for a satisfying dessert. Add a side of fresh berries or a fruit compote for a bright touch.
Use red velvet cheesecake brownies to make ice cream sandwiches or crumble them over yogurt for a tasty treat. Add to a chocolate trifle or layer in dessert cups with custard.
Top with a cream cheese glaze or chocolate ganache for extra richness. A sprinkle of cocoa powder or crushed nuts can add an appealing finish.
Recipe variations
- You can use white chocolate chips instead of cocoa powder in the batter for a sweeter, creamier variation that complements the cheesecake layer well.
- Add 1 teaspoon almond extract to the cream cheese mixture to give the cheesecake filling a subtle nutty flavor that pairs nicely with the classic vanilla and red velvet taste.
- Either all-purpose flour or gluten-free flour blend can be used for the brownie batter, adjusting slightly for texture and baking time as needed for dietary preferences.
- If baking for a larger group, double all ingredients and use a 9×13-inch pan; bake for 35, 40 minutes, checking for doneness with a toothpick tester.
Save This Recipe!
How to Store?
To keep your red velvet cheesecake brownies fresh and delicious, follow these storage tips:
Room Temperature: Place in an airtight container at room temperature up to 2 days. Keep away from direct sunlight to avoid drying out.
Refrigeration: Store in an airtight container in the refrigerator for up to 5 days. Let cool completely before sealing to prevent condensation.
Freezing: Wrap brownies tightly in plastic wrap and place in a freezer-safe container up to 3 months. Thaw at room temperature before serving.
Other Recipes You’ll Love
If you enjoyed this red velvet cheesecake brownies or any other recipe on my blog, please leave a ⭐ star rating and let me know how it went in the comments below. I appreciate taking time to read about this recipe, thank you!