
Red velvet cakesicles are a fun twist on a classic treat, perfect for expressing love on Valentine’s Day. With their vibrant color and rich flavor, they’re sure to brighten up any celebration.
This recipe provides solutions for dryness and blandness, ensuring moist cakesicles with rich flavor while simplifying the baking process for all skill levels.

I’ve had my fair share of baking hiccups, especially when figuring out how to make cakesicles without frosting or avoiding a dry texture. These cakesicles solve those issues effortlessly, making them a delightful choice for surprising family or friends.
This recipe is easy to follow and produces 16 cakesicles in about an hour, including prep and baking time. The results taste so good that it simply feels like love with every bite.
If you’re interested in a fun fruity treat for your celebrations, you might want to check out my Strawberry Shortcake Tiramisu.
Table of contents
Why You Will Love This Recipe
- Soft and Tender Texture: The combination of buttermilk and oil makes for a cake that’s soft and moist. Each cakesicle promises melt-in-your-mouth happiness, creating that perfect bite for any occasion.
- Vibrant Color: The red gel food coloring gives these cakesicles a striking appearance, making them ideal for Valentine’s Day. Your dessert table will shine, visually capturing the spirit of the celebration.
- Sweet and Creamy Frosting: The cream cheese and butter frosting adds a rich flavor that perfectly complements the red velvet cake. It creates a harmonious blend, making each cakesicle taste luxurious and satisfying.
- Make-Ahead Convenience: Preparing the cake ahead of time allows you to assemble the cakesicles when you’re ready. They store well in the fridge, so you can easily whip them out for unexpected guests or last-minute cravings.

Red Velvet Cakesicles for Valentines Day
- Prep Time: 40 minutes
- Cool Time:
- Cook Time: 20 minutes
- Total Time: 1 hour
- Yield: 16 cakesicles 1x
- Category: dessert
- Method: Baking
- Cuisine: American
- Diet: Vegetarian
Description
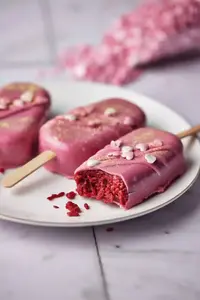
Delicious red velvet cakesicles with creamy frosting and a chocolate coating, perfect for Valentine’s Day.
Ingredients
- 1 ¼ cups (150g) cake flour
- 1 cup (200g) granulated sugar
- 1 tablespoon unsweetened cocoa powder
- 1 teaspoon salt
- 1 teaspoon baking soda
- 1 large egg
- ¾ cup (164g) vegetable oil
- ½ cup (120g) buttermilk
- 1 tablespoon white wine vinegar
- 1 teaspoon vanilla extract
- ½ teaspoon red gel food coloring
- ½ cup (113g) cream cheese, softened
- ⅓ cup (75g) unsalted butter, softened
- 4 cups (480g) powdered sugar
- 1 teaspoon vanilla extract
- 250g candy melts or melting chocolate (white chocolate recommended)
- Sprinkles, for decoration
Instructions
- Step 1: Preheat oven to 325°F (170°C) and line a sheet pan with parchment paper to ensure even baking and easy removal.

- Step 2: In a mixing bowl, whisk together the large egg, buttermilk, vegetable oil, and vanilla extract until smooth and blended.
- Step 3: Gradually add the granulated sugar, cake flour, cocoa powder, and salt to the liquid mixture. Mix on medium speed until well combined to prevent ingredients from flying out of the bowl.
- Step 4: Stir in the red gel food coloring until the batter reaches your desired shade of red.
- Step 5: In a small bowl, mix the baking soda with white wine vinegar until it bubbles and foams, then immediately pour this mixture into the batter and stir to combine.
- Step 6: Pour the batter evenly into the prepared sheet pan. Bake for about 20 minutes or until a skewer inserted into the center comes out clean.
- Step 7: In a separate bowl, cream together the softened cream cheese and unsalted butter until smooth using an electric mixer.
- Step 8: Add powdered sugar and vanilla extract slowly to the frosting mixture to avoid creating a powdered sugar cloud. Mix on low speed until incorporated.
- Step 9: Increase mixer speed to high and beat the frosting for 2 to 3 minutes until light and fluffy.
- Step 10: Once completely cooled, break the cake into crumbs by rubbing it between your fingers. Ensure no large chunks remain for smooth mixing.
- Step 11: Add the fluffy frosting to the cake crumbs and combine thoroughly by hand. Aim to form a dough-like consistency that is compact but not too wet.
- Step 12: Melt candy melts or chocolate carefully, avoiding overheating to keep the coating smooth and glossy.
- Step 13: Spoon melted chocolate into the cakesicle molds and insert the popsicle sticks. Refrigerate for several minutes to allow the chocolate to partially set and secure the sticks.
- Step 14: Gently press the cakesicle mixture into the molds, making sure it is compacted evenly without pressing too hard to avoid damaging the chocolate shell.
- Step 15: Pour additional melted chocolate over the top of the filled molds to seal the cakesicles. Return the molds to the refrigerator until fully set.
- Step 16: Carefully remove cakesicles from the molds once set. Decorate with sprinkles or other desired toppings as preferred.
Notes
- Room Temperature: Store cakesicles in an airtight container at room temperature for up to 2 days, avoiding direct sunlight or heat.
- Refrigeration: Keep in an airtight container in the refrigerator for up to 5 days to maintain frosting firmness and prevent melting.
- Freezing: Wrap cakesicles individually in plastic wrap and place in a freezer-safe bag. Freeze for up to 3 months. Thaw fully at room temperature before serving.
- Ensure the cake is completely cooled before crumbling to prevent a wet, unusable mixture that will not bind well.
- If the chocolate coating is too thick or difficult to work with, stir in 1 teaspoon of vegetable oil into melted chocolate to achieve a smoother consistency.
- If batter is too dry during preparation, add buttermilk 1 tablespoon at a time to reach a moist, pourable texture.
- Use a warm knife or spatula to smooth frosting evenly before coating to avoid uneven decorating.
- If candy melts do not set properly, chill in the refrigerator an additional 10 minutes after sealing with chocolate to harden fully.
Nutrition
- Serving Size: 1 cakesicle
- Calories: 350
- Sugar: 28g
- Sodium: 290mg
- Fat: 20g
- Saturated Fat: 7g
- Unsaturated Fat: 10g
- Trans Fat: 0g
- Carbohydrates: 35g
- Fiber: 1g
- Protein: 4g
- Cholesterol: 45mg

Ingredient Notes
- Cake flour: Choose a high-quality cake flour for a tender crumb. It helps achieve that soft texture we love in cakesicles!
- Cocoa powder: Use unsweetened cocoa powder for rich chocolatey flavor. Look for brands with a deep color, indicating a strong taste.
- Vegetable oil: A light vegetable oil keeps the cakes moist and tender. Avoid using olive oil, as it can overpower the delicate flavors.
- Red food coloring: Gel or liquid coloring can intensify the red hue. Gel colors yield a more vibrant shade without altering the batter’s consistency.
- Unsalted butter: Use good quality unsalted butter for creaminess. This recipe calls for melted butter to easily blend into the batter.
- Eggs: Two large eggs, preferably at room temperature, will add moisture and structure to the cakesicles. Make sure they’re fresh for the best results!
- Buttermilk: This adds tanginess and moisture, resulting in a lighter texture. If you’re out, mix milk with a bit of vinegar to make a quick substitute!
- Vanilla extract: Opt for pure vanilla extract for a deeper flavor profile. It complements the cocoa and enhances the overall taste.
- White chocolate: Use good quality melting white chocolate for the coating. It adds sweetness and a nice contrast to the rich, chocolatey cake.
- Sprinkles: These add a festive touch! Use colorful sprinkles to brighten up the cakesicles; just make sure they’re the right size for sticking on easily.
Recipe Tips
- If your cakesicles crumble, ensure the cake is completely cool before crumbling, as warm cake results in a wet mixture that won’t hold together.
- When the chocolate coating is too thick, add 1 teaspoon of vegetable oil to the melted chocolate for a smoother consistency before applying.
- If the cake batter is too dry, add 1 tablespoon of buttermilk at a time until it achieves a moist, pourable consistency during mixing.
- For uneven decorating, use a warm knife to gently smooth over the frosting, ensuring an even layer before applying the coating.
- If the candy melts don’t set properly, chill the molds for an additional 10 minutes after sealing with chocolate to aid in hardening.
Serving Suggestions
Serve red velvet cakesicles alongside a scoop of sugar-free vanilla ice cream or a light berry compote. A fresh fruit salad or whipped cream pairs well, adding a celebratory touch to this dessert.
Use red velvet cakesicles to create cake pops or crumbled cake desserts. Add to a layered dessert parfait with yogurt, berries, and whipped topping for an elegant treat.
Top with melted dark chocolate or a cream cheese drizzle for extra richness. Sprinkle with toasted nuts or add shavings of sugar-free chocolate for a finishing touch.
Recipe variations
- You can use gluten-free flour instead of all-purpose flour to make red velvet cakesicles suitable for gluten-sensitive diets, maintaining a similar texture and structure in the batter.
- Add ½ teaspoon of beet juice as a natural alternative to red gel food coloring for the red velvet cakesicle batter, providing a subtle color and flavor variation.
- Either vegetable oil or melted coconut oil can be used to provide moisture in the cakesicle batter, each offering a slight difference in taste and richness.
- If making larger batches, you can double the amounts of sugar and buttermilk accurately, adjusting the baking time slightly and monitoring doneness with a skewer.
- These red velvet cakesicles make an excellent treat alongside my Red Velvet Brownies, combining a variety of textures with consistent flavor notes for Valentine’s celebrations.
Save This Recipe!
How to Store?
To keep your red velvet cakesicles fresh and delicious, follow these storage tips:
Room Temperature: Place red velvet cakesicles in an airtight container at room temperature up to 2 days. Avoid direct sunlight or heat exposure.
Refrigeration: Use an airtight container to store cakesicles in the refrigerator up to 5 days. Chill prevents melting and keeps frosting firm.
Freezing: Wrap cakesicles individually in plastic wrap, then place in a freezer bag for up to 3 months. Thaw at room temperature fully before serving.
Other Recipes You’ll Love
If you enjoyed this red velvet cakesicles or any other recipe on my blog, please leave a ⭐ star rating and let me know how it went in the comments below. I appreciate taking time to read about this recipe, thank you!