
If you’ve ever craved something special, these red velvet brownies are just the thing. They’re soft, rich, and beautifully vibrant, making them perfect for any occasion, even a cozy night in.
This recipe targets uneven coloring, cheesecake layer sinking, unclear mixing steps, lack of storage advice, and missing background details for red velvet brownies.
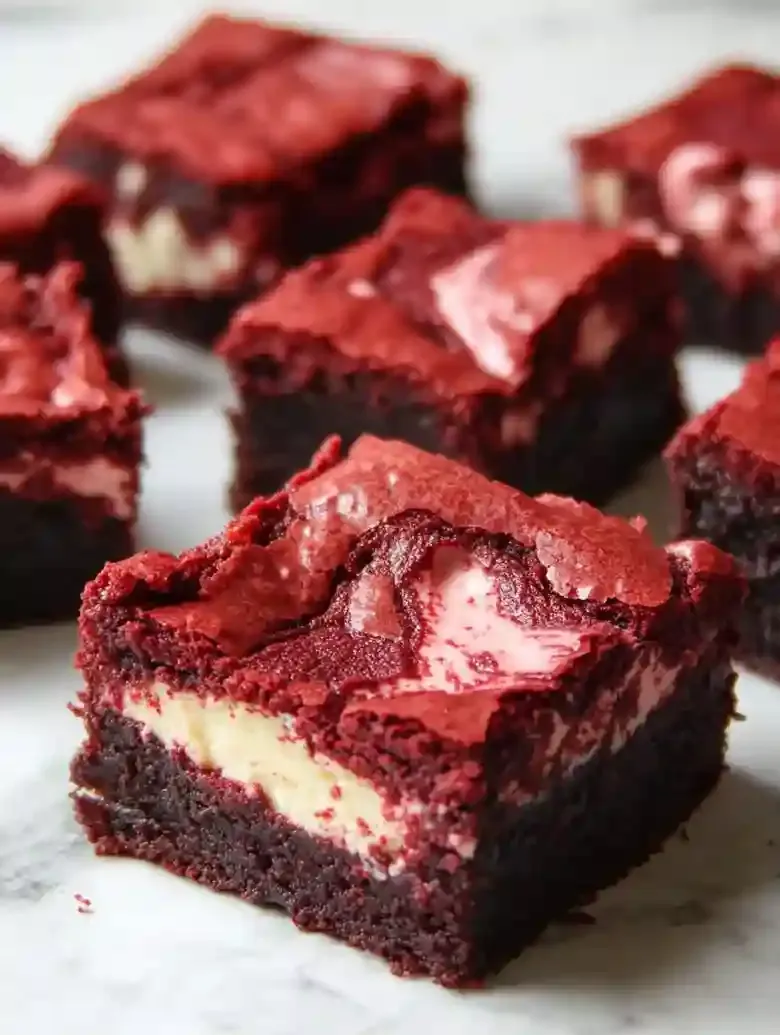
What I love about this recipe is that it tackles common setbacks, like the struggle of getting that deep red color or achieving the ideal fudgy texture. I remember a time I ended up with brownies that looked more brown than red; I won’t make that mistake again!
This recipe has been tested and works like a charm. With just 20 minutes of prep and a little time in the oven, you’ll have delightful brownies that stand out at any gathering, or on your own kitchen table, too. If you want more chocolate goodness, make sure to check out my Brownie Lovers Peanut Butter Pizza.
Table of contents
Dietary Considerations
- This recipe is not gluten-free due to the inclusion of all-purpose flour in the ingredients.
- The recipe contains eggs and butter, so it is unsuitable for vegan diets.
- The recipe suits dairy-free diets only when using ⅓ cup coconut oil instead of butter and nondairy milk for buttermilk.
- This recipe does not meet keto or low-carb diets because of the sugars and flour used.
- The recipe is nut-free as no nuts or nut-based products appear in the ingredients list.
Why You Will Love This Recipe
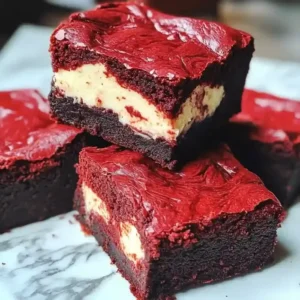
- Unique Flavor Profile Experience the delightful contrast of rich chocolate notes blended with the distinct tang of cream cheese. This combination is what sets red velvet brownies apart, creating a treat that’s truly special at any gathering.
- Irresistible Texture The classic fudgy brownie structure pairs perfectly with a creamy cheesecake swirl, providing a satisfying bite that’s both chewy and smooth. This balance makes them a joy to eat, satisfying a range of cravings.
- Perfect for Celebrations With their striking red hue, these brownies immediately draw attention and create excitement at parties or special occasions. They make not just a dessert, but a centerpiece, encouraging everyone to gather around for a slice.
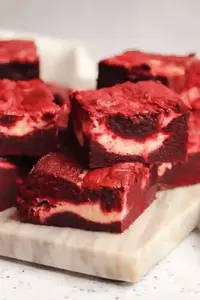
- Make-Ahead Convenience These red velvet brownies can be prepared in advance and stored, ensuring you’ll always have a sweet surprise on hand. Their flavor actually improves after a day, making them a great option for busy schedules.
How to Make Red Velvet Brownies
- Prep Time: 20 minutes
- Cool Time: 2 hours
- Cook Time: 30 minutes
- Total Time: 2 hours 50 minutes
- Yield: 16 pieces 1x
- Category: dessert
- Method: baking
- Diet: vegetarian
Description
Delicious red velvet brownies with a creamy cheesecake swirl, perfect for dessert lovers.
Ingredients
- 150 g (5.3 oz) unsalted butter, softened to room temperature
- 275 g (9.7 oz) caster sugar (for brownie base)
- 2 tsp vanilla extract
- 1 tsp red food colouring (gel recommended)
- 4 medium eggs (room temperature preferred)
- 30 g (1 oz) cocoa powder (preferably high-quality unsweetened, Dutch-processed)
- 125 g (4.4 oz) plain all-purpose flour, sifted
- 1 tsp white wine vinegar
- 250 g (8.8 oz) full-fat cream cheese, room temperature
- 75 g (2.6 oz) caster sugar
- 1 tsp vanilla extract
- 1 egg yolk
Instructions
- Step 1: Preheat the oven to 180°C (356°F) conventional or 160°C fan. Line a 9×9-inch square baking tin with parchment paper fully covering the base and sides for easy removal.

- Step 2: Beat the unsalted butter and 275 g caster sugar together using an electric mixer until smooth, creamy, and light in color, indicating the sugar is well incorporated and the mixture is fluffy.
- Step 3: Add 2 tsp vanilla extract and 1 tsp red food colouring to the butter and sugar mixture. Mix thoroughly to form a thinner paste that is evenly red in color throughout the batter.
- Step 4: Break in the 4 medium eggs one at a time, beating well after each addition to fully emulsify the batter and maintain texture consistency.
- Step 5: Sift together 30 g cocoa powder and 125 g plain flour. Add them to the wet mixture and beat gently to combine completely, ensuring there are no lumps but do not overmix to avoid dense brownies.
- Step 6: Stir in 1 tsp white wine vinegar last; mixing thoroughly. You may notice a slight fizz which indicates reaction enhancing the red color and flavor depth.
- Step 7: In a separate bowl, beat 250 g room temperature cream cheese, 75 g caster sugar, and 1 tsp vanilla extract until smooth and lump-free. Add 1 egg yolk and mix again briefly until fully combined.
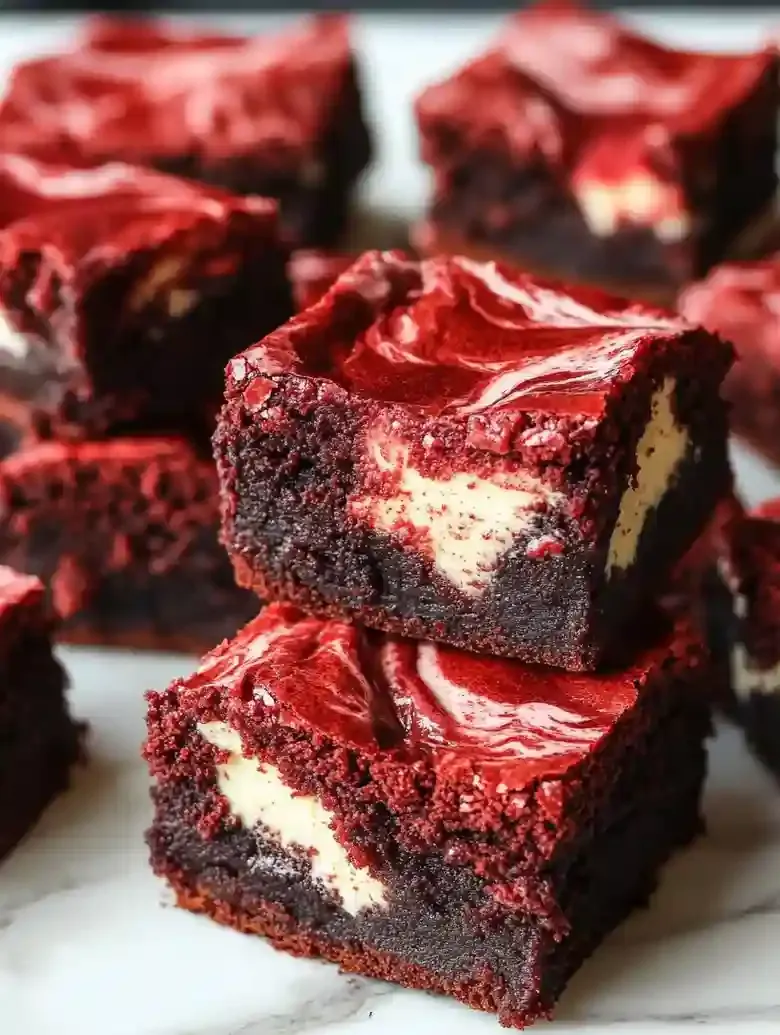
- Step 8: Pour approximately 90% of the brownie mixture into the prepared baking tin and spread evenly. Dollop the cheesecake mixture over the brownie base in separate spoonfuls. Then dollop the remaining 10% of the brownie mixture over the cheesecake layer in small spots.
- Step 9: Using a knife or skewer, swirl the brownie and cheesecake layers gently to create a marbled pattern. Do not over-swirl; keep some distinct layers visible for visual contrast.
- Step 10: Bake in the preheated oven for 28 to 35 minutes or until a toothpick inserted into the center comes out with a few moist crumbs. After baking, leave the brownies to cool in the tin for 20 to 30 minutes, then transfer to a wire rack to cool completely (approximately 2 hours) before cutting into 16 squares.
Notes
- Room Temperature: Store brownies in an airtight container at room temperature for up to 2 days. Keep away from direct sunlight and heat.
- Refrigeration: Place brownies in an airtight container in the refrigerator for up to 7 days. Bring to room temperature before serving for the best texture and flavor.
- Freezing: Wrap individual brownie squares in plastic wrap, then place in a freezer-safe bag or container. Freeze for up to 2 months. Thaw at room temperature when ready to serve.
- Use unsalted butter softened at room temperature to ensure smooth mixing and proper fat integration, which impacts moistness.
- To achieve a rich chocolate flavor and deepen color, select high-quality Dutch-processed unsweetened cocoa powder.
- Gel food coloring is recommended for a vibrant, true red color without affecting flavor; if the color is not vivid enough, add an additional ½ teaspoon during mixing.
- Ensure cream cheese is at room temperature before mixing the cheesecake layer to prevent lumps and sinking. Mix gently for about 2 minutes only.
- Check doneness at 28 minutes by inserting a toothpick; a few moist crumbs indicate proper baking.
- For thicker brownies, allow them to cool completely (at least 30 minutes) before slicing.
- To create a more defined cheesecake swirl, gently run a knife through the batter 90 seconds into baking.
Nutrition
- Serving Size: 1 piece
- Calories: 350
- Sugar: 75g (combined caster sugar in both layers)
- Sodium: Not specified explicitly
- Fat: Not specified explicitly
- Saturated Fat: Not specified explicitly
- Unsaturated Fat: Not specified explicitly
- Trans Fat: 0g
- Carbohydrates: Not specified explicitly
- Fiber: Not specified explicitly
- Protein: Not specified explicitly
- Cholesterol: Not specified explicitly
Ingredient Notes
- Butter: Use unsalted butter for clear control over flavor. Let it soften at room temperature for easy mixing, providing rich moisture to the brownies.
- Cocoa powder: Choose high-quality unsweetened cocoa for rich chocolate flavor. Dutch-processed cocoa deepens the color and taste, enhancing the brownies’ overall profile.
- Granulated sugar: Opt for fine granulated sugar to ensure even sweetness. It’s vital for creating that chewy texture, helping to balance the cocoa’s bitterness.
- Brown sugar: Light brown sugar adds moisture and a hint of caramel flavor. Its natural moisture content improves the brownies’ chewy texture and richness.
- Eggs: One large egg at room temperature binds the ingredients. It also contributes to the overall structure, so it’s important not to skip this step.
- Red food coloring: Use gel food coloring for a vibrant, true red. A little goes a long way, intensifying the visual appeal without altering the flavor significantly.
- Vanilla extract: A splash of pure vanilla enhances the overall flavor. Opt for pure over imitation for a more authentic taste that complements the cocoa.
- Flour: All-purpose flour works best for structure. Make sure it’s fresh, as stale flour can affect both texture and flavor in the final product.
- Buttermilk: It adds acidity, which helps the brownies rise and stay tender. If unavailable, substitute with regular milk mixed with a bit of vinegar.
- Chocolate chips: Semi-sweet chips add bursts of chocolate flavor. Choose a good quality brand to balance the sweetness, enhancing the overall taste experience.
Recipe Tips
- If the red color isn’t vibrant, add another ½ teaspoon of red food coloring during mixing to achieve the desired hue.
- When the cheesecake layer sinks, ensure your cream cheese is at room temperature and mix gently for 2 minutes to avoid overmixing.
- If your brownies appear to be underbaked, insert a toothpick 28 minutes into baking; it should come out with a few moist crumbs.
- For a thicker brownie texture, allow the brownies to cool completely for at least 30 minutes before cutting into squares.
- If your brownies lack a creamy swirl, use a knife 90 seconds into baking to gently create a more defined pattern in the cheesecake layer.
Serving Suggestions
Serve with a scoop of vanilla ice cream or whipped cream. Pair with fresh berries, like raspberries or strawberries, for a burst of color.
Use to make brownies sundaes or chocolate parfaits. Add to a trifle with layers of cream and fresh fruit.
Top with a drizzle of cream cheese frosting or chocolate sauce. Sprinkle with chopped nuts or shredded coconut for added texture.
Recipe variations
- You can use chopped pecans or walnuts to add crunch to your red velvet brownies. Add 1/2 cup of nuts to the brownie batter before baking for texture variation.
- Add 1/2 teaspoon of cinnamon or 1 teaspoon of instant espresso powder to lightly enhance the red velvet flavor. Both options bring subtle depth to the brownies’ taste.
- Either dark or white chocolate chips work well when stirred into the brownie batter. Add 3/4 cup of chips for pockets of melted chocolate in every bite.
- If using a larger pan, increase the ingredients by 50% for thicker brownies. You can also enjoy these alongside my Pumpkin Chocolate Chip Bars for a similar sweet treat experience.
Save This Recipe!
How to Store?
To keep your red velvet brownies fresh and delicious, follow these storage tips:
Room Temperature: Store in an airtight container at room temperature up to 2 days. Keep away from heat and direct sunlight.
Refrigeration: Place in an airtight container in the refrigerator for up to 7 days. Let brownies come to room temperature before serving.
Freezing: Wrap brownies individually in plastic wrap and place in a freezer bag. Freeze up to 2 months. Thaw at room temperature.
Other Recipes You’ll Love
- Toasted Coconut Marshmallows
- Puff Pastry Apple Rosettes
- Rhubarb and Strawberry Tart Recipe
- Chocolate Peanut Clusters
If you enjoyed this Red Velvet Brownies or any other recipe on my blog, please leave a ⭐ star rating and let me know how it went in the comments below. I appreciate taking time to read about this recipe, thank you!