
Okonomiyaki is a tasty Japanese savory pancake that’s fun to customize. It’s loaded with different ingredients and topped with a rich sauce that really makes it special. Everyone can get in on the cooking!
This recipe solves soggy batter, uneven cooking, and messy prep by offering simple measurements, flexible fillings, and clear steps for quick, reliable okonomiyaki.
Since I have diabetes, I sometimes struggle to find meals that feel indulgent but still fit my dietary needs. This recipe for Okonomiyaki lets me create something delicious while keeping ithealthy and gluten-free for my family.
What I love about this Okonomiyaki recipe is that it’s quick to make. In just 40 minutes, you’ll have a meal that’s satisfying and can easily feed a crowd. Plus, it’s a great way to use up any leftover veggies in your fridge!
If you want to whip up something equally delicious, consider making Red Velvet Pancakes as a sweet treat for friends.
Table of contents
Why You Will Love This Recipe
- Flavor Explosion : Each bite of okonomiyaki is savory and umami-rich, loaded with fresh ingredients like cabbage and pork that pack a tasty punch.
- Creative Toppings : You can let your imagination run wild with toppings. Whether you like it traditional or want to add something new, it’s all up to you.
- Convenient for Meal Prep : These babies freeze well, so you can make a batch ahead of time. Just pop them in the microwave for a quick meal later.
- Fun for Everyone : Cooking okonomiyaki can be a real family bonding time. Everyone can pitch in with layering their favorite ingredients and making it their own.
Delicious Okonomiyaki Pancake Recipe
- Prep Time: 15 minutes
- Cool Time: None
- Cook Time: 25 minutes
- Total Time: 40 minutes
- Yield: 4 servings 1x
- Category: Main Dish
- Method: Pan-Frying
- Cuisine: Japanese
- Diet: Nut-Free
Description
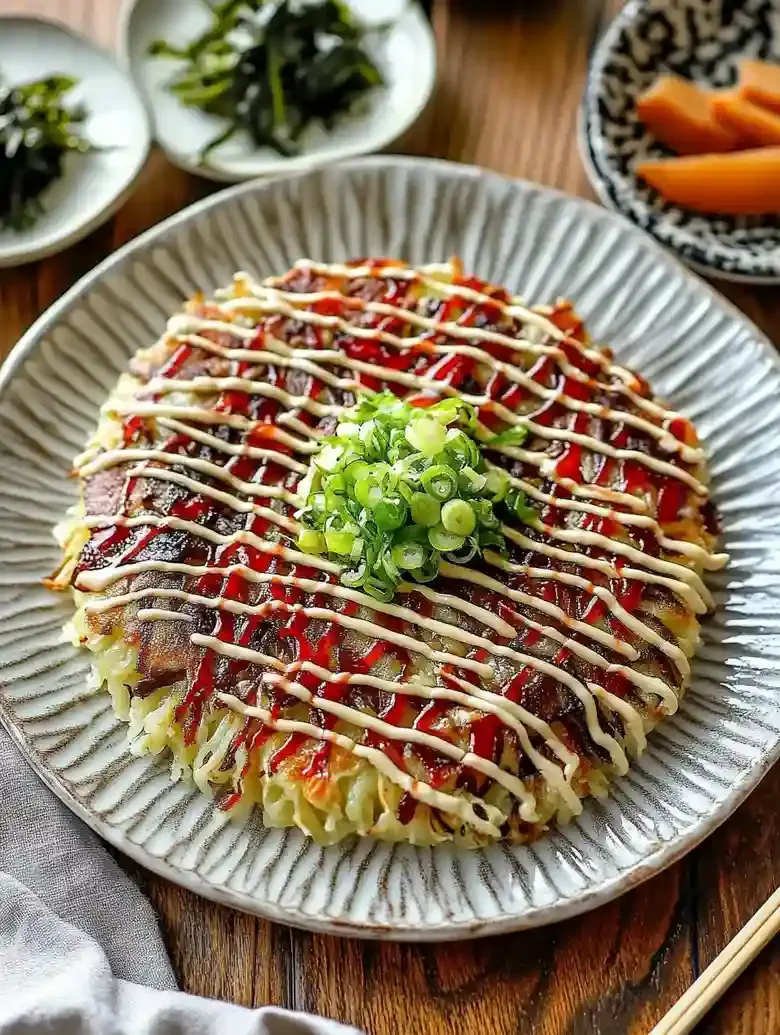
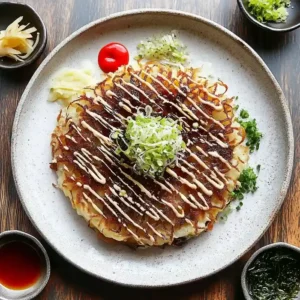
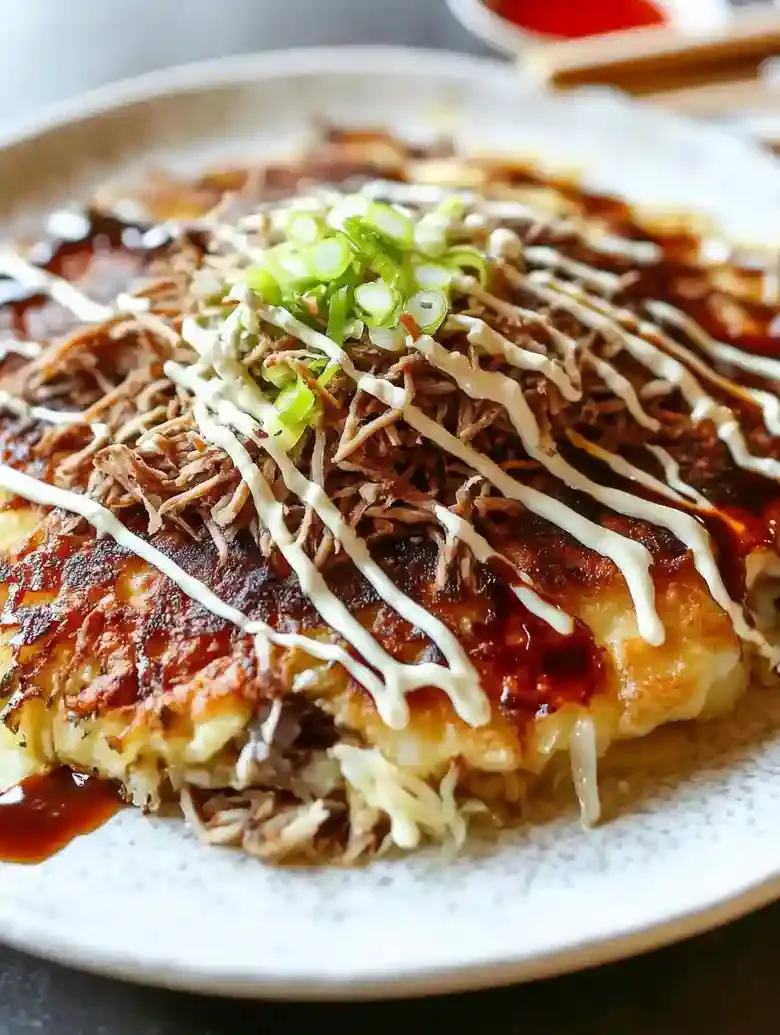
A savory Japanese pancake filled with various ingredients like cabbage and pork belly, topped with sauces and garnishes.
Ingredients
- 1 cup (120g) all-purpose flour, sifted
- 1/4 tsp Diamond Crystal kosher salt
- 1/4 tsp sugar
- 1/4 tsp baking powder
- 5.6 oz (160g) nagaimo/yamaimo (mountain yam), grated
- 3/4 cup (180ml) dashi (Japanese soup stock)
- 1/2 head green cabbage, shredded
- 1/4 cup (40g) pickled red ginger (beni shoga)
- 1/2 lb (227g) sliced pork belly
- 4 large eggs, room temperature
- 1/2 cup (30g) tenkasu (tempura scraps)
- Neutral oil, for cooking
- Okonomiyaki sauce, for serving
- Japanese Kewpie mayonnaise, for serving
- Katsuobushi (dried bonito flakes), for garnish
- Aonori (dried green laver seaweed), for garnish
Instructions
- Mix Batter Together: Start by mixing all the ingredients in a bowl until they are just combined. You want it to have a slightly lumpy texture. This gives the okonomiyaki a nice structure, so do not overdo it. If it is too smooth, your pancakes can end up flat and lifeless.
- Preheat Your Pan: Heat up your skillet over medium heat until it is nice and hot, which usually takes a few minutes. You will notice a bit of sizzle when you drop a little batter on it. This step is key for getting that crispy edge, so do not skip it!
- Pour & Spread the Batter: Spoon the batter onto the pan, creating a circular shape. Use the back of the spoon to spread it out a bit without going too thin. You will smell the batter cooking, and it will start to bubble when it is ready.
- Flip Carefully: After a few minutes, check the underside, which should be golden brown. Flip it gently to keep it intact. This is where patience comes in; if you try flipping too soon, it could break.
- Add Toppings & Cook: Once flipped, sprinkle your desired toppings evenly over the surface. You will notice the smell getting more aromatic as they cook. This helps develop flavors, but watch closely—burnt toppings can ruin the dish.
- Plate & Drizzle Sauces: When they are golden brown on both sides, slide your okonomiyaki onto a plate. Drizzle with your preferred sauces, maybe some mayo or okonomiyaki sauce, and sprinkle with bonito flakes if you like.
Notes
- Storage Tips: Wrap each okonomiyaki (without sauce or toppings) in aluminum foil and store in a freezer bag. Refrigerate for up to 3 days or freeze for a month.
- Expert Tips: A good solution for dense pancakes is mixing in an extra 1/4 cup of dashi and allowing the batter to rest for 30 minutes. When working with cabbage, a salad spinner can remove excess moisture effectively.
- For toppings that tend to burn, cooking over medium-low heat and covering the pan can help achieve even cooking without charred ingredients. If the pancake breaks while flipping, keeping the mixture thick and compact helps maintain its structure.
- When fresh nagaimo yam is not available, consider replacing it with well-drained tofu to keep the pancake’s fluffiness intact.
- Reheating Instructions: Reheat in a skillet over medium heat for about 5 minutes, or until heated through.
- Serving Suggestions: Serve with cold tofu or edamame. Pair with Japanese fried chicken (karaage) or offer a side of pickled vegetables for contrast.
- Recipe Variations: Replace pork with chicken or tofu for a different protein. Add yakisoba noodles for a modern twist.
Nutrition
- Serving Size: 1 pancake
- Calories: 725
- Sugar: 12g
- Sodium: 643mg
- Fat: 44g
- Saturated Fat: 13g
- Unsaturated Fat: 0g
- Trans Fat: 0g
- Carbohydrates: 62g
- Fiber: 9g
- Protein: 21g
- Cholesterol: 227mg
Ingredient Notes
- All-purpose flour: This forms the base, giving structure. Choose a good-quality brand and sift it for a fluffier texture.
- Kosher salt: Just a pinch to balance flavors. I like using Diamond Crystal for its fine texture, which mixes in well.
- Sugar: It adds just a hint of sweetness to balance everything out. Granulated sugar works fine, but coconut sugar is a nice alternative.
- Baking powder: A little leavening agent helps make the batter light and airy. Make sure it’s fresh for the best results!
- Nagaimo (mountain yam): This adds a unique texture and helps bind everything. If you can’t find it, try using regular yam or sweet potato.
- Dashi: It’s the heart of the flavor! You can use instant dashi powder or make it from scratch if you’re up for it.
- Green cabbage: Gives great crunch and flavor. Don’t forget to dry it well; a salad spinner works wonders for this!
- Pickled red ginger (beni shoga): This brings a nice tangy bite. If you’re not a fan, feel free to skip it or use regular pickled ginger.
- Sliced pork belly: This adds tasty richness and savory flavor. Bacon can be a suitable substitute if pork belly isn’t available.
- Eggs: They help bind everything, making for a sturdy pancake. Use large eggs and let them sit out to reach room temperature for best results.
- Tenkasu (tempura scraps): This adds a fantastic crunch. If you can’t find them, crushed-up crispy fried onions can do the trick!
- Neutral oil: Any oil with a high smoke point, like vegetable or canola, is great. It helps the pancakes fry up nicely without sticking.
- Okonomiyaki sauce: This sweet-savory sauce is key for flavor! If you’re in a pinch, mix Worcestershire sauce with a little ketchup.
- Japanese Kewpie mayonnaise: Its creaminess and tang are just right. Regular mayo can work, but it won’t have the same kick.
- Katsuobushi (dried bonito flakes): They add umami and a nice touch as a topping. If missing, try using seaweed flakes for some extra flavor!
- Aonori (dried green laver seaweed): This brings a subtle flavor and a pop of color on top. You can replace it with regular seaweed if needed.
Recipe Tips
- If the pancake turns out dense, a good solution is mixing in an extra ¼ cup of dashi and allowing the batter to rest for 30 minutes.
- When working with the cabbage, a salad spinner can remove excess moisture effectively, helping the pancake hold together better when cooked.
- For toppings that tend to burn, cooking over medium-low heat and covering the pan can help achieve even cooking without charred ingredients.
- If the pancake breaks while flipping, keeping the mixture thick and compact helps maintain its structure; pressing gently while cooking also aids the flip.
- When fresh nagaimo yam isn’t available, consider replacing it with well-drained tofu to keep the pancake’s fluffiness intact.
Serving Suggestions
Serve these okonomiyaki pancakes with cold tofu or edamame as a refreshing contrast. Pair them with Japanese fried chicken or offer pickled vegetables for added crunch.
These pancakes can also work well as a base for various toppings or fillings. Use them as a wrap for savory options like tofu, vegetables, or meats.
Consider drizzling a tangy sauce or soy sauce over the pancakes for finishing touches. A sprinkle of green onions or sesame seeds adds extra flavor and visual appeal.
Recipe variations
- You can use rice flour instead of all-purpose flour for a gluten-free version of okonomiyaki, adding a unique texture to your dish.
- Add 1 tbsp of soy sauce and 1 tsp of sesame oil for an umami-rich boost, enhancing the flavors beautifully.
- Either substitute pork with chicken for a lighter option or use tofu for a plant-based alternative that works well with the remaining ingredients.
- If you’re serving a larger group, double the recipe by using 2 cups of flour, 8 large eggs, and 1.2 oz of nagaimo/yamaimo.
Save This Recipe!
How to Store?
To keep your okonomiyaki fresh, follow these storage tips:
Refrigeration: Wrap each okonomiyaki without sauce in aluminum foil. Store in an airtight container in the fridge for up to 3 days.
Freezing: Wrap okonomiyaki in aluminum foil, place in a freezer bag, and freeze for up to 1 month. Thaw in the refrigerator overnight.
Reheating: To warm, place thawed okonomiyaki in a frying pan over medium heat for a few minutes on each side.
Other Recipes You’ll Love
If you enjoyed this Okonomiyaki or any other recipe on my blog, please leave a ⭐ star rating and let me know how it went in the comments below. I appreciate taking time to read about this recipe, thank you!