
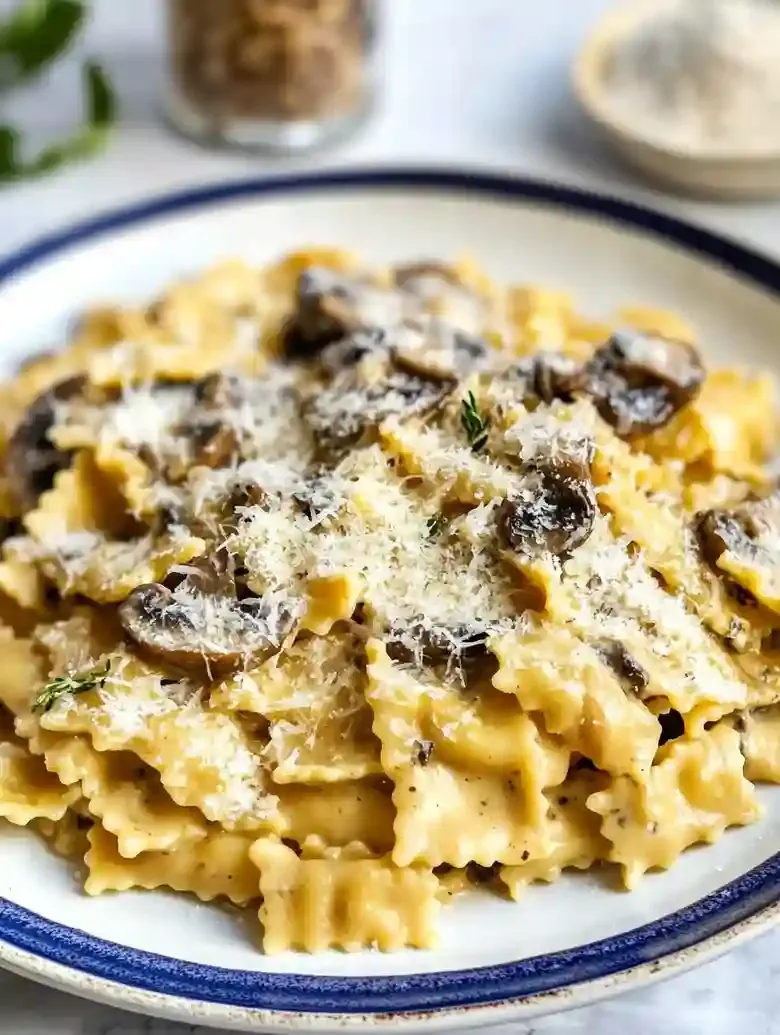
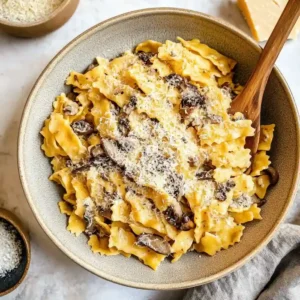
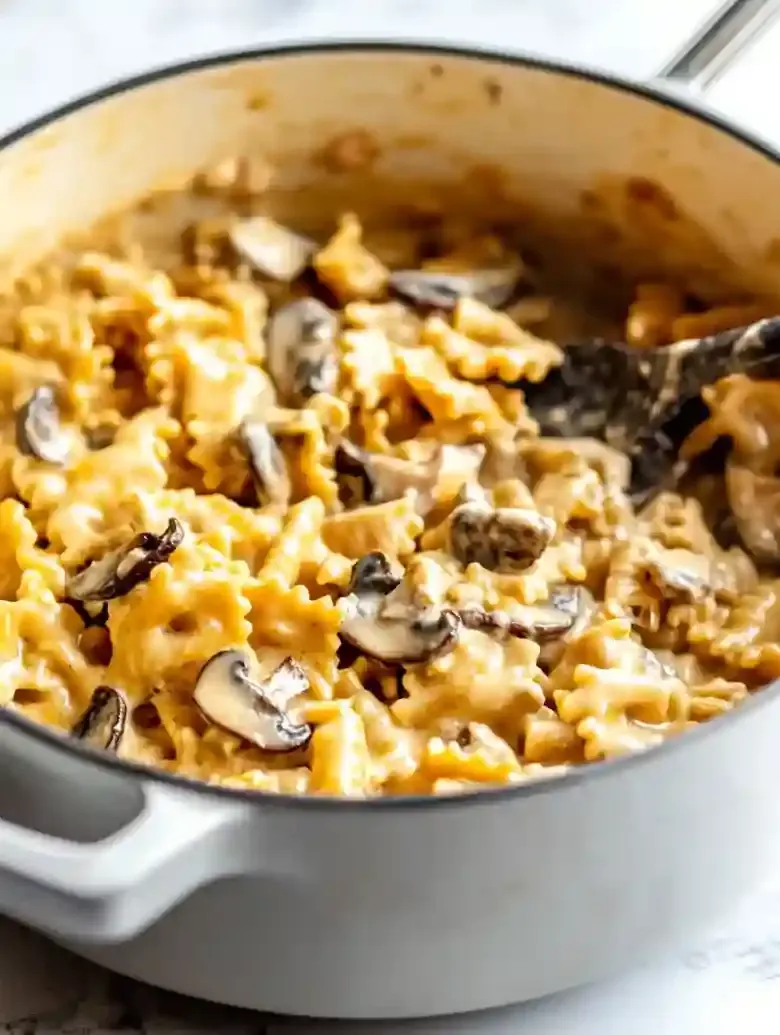
If you’re on the hunt for an easy weeknight dish, this miso mushroom pasta is a total winner. Packed with sautéed mushrooms and a flavorful miso sauce, this recipe creates an umami-rich meal that’s comforting and satisfying, all in just 40 minutes.
This recipe tackles quick preparation and flavor issues commonly faced with pasta dishes, delivering a simple, delicious meal in one pot.
Cooking pasta can sometimes feel overwhelming, especially when trying to get that creamy texture without using cream. I used to struggle with making sauces taste rich without all the extra calories. With this recipe, I found a way to achieve that creamy richness in a much lighter way, and my family loves it!
This well-tested recipe stands out because it uses one pot, which means less time cleaning up afterward. In about 15 minutes of prep and 25 cooking, you’ll have a hearty dish ready to serve right from the stovetop, perfect for those busy evenings.
If you’re trying to lighten your pasta nights, check out my recipe for Broccolini Frittata for another approachable option.
Table of contents
Why You Will Love This Recipe
- Rich Umami Flavor , The miso paste and sautéed mushrooms create a deep, savory taste that’s satisfying and addictively good, offering an excellent alternative to traditional cream sauces.
- Creamy Consistency , Combining coconut milk and cheese results in a luxurious sauce that clings beautifully to the pasta, providing a fantastic mouthfeel that you’ll want to savor.
- Quick Weeknight Solution , You can whip up this dish in just under 45 minutes, making it ideal for busy evenings when you crave something comforting and homemade.
- Easy One-Pot Clean-Up , Since everything cooks together in one pot, you’ll spend less time scrubbing pans afterward, allowing you to enjoy your meal more and worry less about the dishes.
Creamy Miso Mushroom Pasta Recipe
- Prep Time: 60 minutes
- Cool Time: See notes
- Cook Time: 25 minutes
- Total Time: 8 hours
- Yield: 24 cakes 1x
- Category: Appetizer
- Method: Frying
- Cuisine: American
- Diet: Vegetarian
Description
Vegetarian lion’s mane ‘crab’ cakes with a crisp panko crust and dill garlic aioli. Freezer-friendly, yields 24 cakes.
Ingredients
- 1 pound (450 g) lion’s mane mushrooms, shredded
- 1 medium onion, finely diced
- 1 small red pepper, finely diced
- 1/4 cup (60 ml) olive oil, plus 2 tablespoons (30 ml) for cooking
- 3 eggs
- 1/2 cup (120 ml) Kewpie mayo
- 2 tablespoons (30 ml) Worcestershire sauce
- 2 tablespoons (30 ml) freshly squeezed lemon juice
- 1/2 cup (60 g) panko crumbs for filling
- 1 1/2 cups (180 g) panko crumbs for breading
- 2 stalks spring onion, chopped
- 1 tablespoon (15 g) Old Bay seasoning
- 1 tablespoon (15 g) fresh Italian parsley, roughly chopped
- 11/2 teaspoon (5 g) salt
- 1/21/2 teaspoon (2.5 g) pepper
- 1/4 cup (30 g) all-purpose flour
- 2 tablespoons (15 g) all-purpose flour
- 1 clove garlic, minced
- 11/2 teaspoon (5 g) freshly chopped dill
- 1/4 cup (60 ml) sour cream
- Lemon wedges, for garnish (optional)
Instructions
- Step 1: Prepare the Aioli: In a bowl, combine sour cream, minced garlic, freshly chopped dill, and some lemon juice or seasoning as desired. Stir all ingredients thoroughly to create a creamy sauce. Set aside to allow flavors to meld.

- Step 2: Sauté the Vegetables: Heat 1/4 cup (60 ml) olive oil in a skillet over medium-high heat. Add finely diced onion and red pepper. Cook, stirring occasionally, until vegetables are soft and fragrant.
- Step 3: Cook the Lion’s Mane Mushrooms: Add shredded lion’s mane mushrooms to the skillet with vegetables. Stir occasionally, cooking until the mushrooms turn golden and the moisture has evaporated. This ensures a flaky, crab-like texture and improves binding.
- Step 4: Cool and Combine: Transfer the cooked mixture to a bowl and let it cool completely to prevent scrambled eggs. Once cooled, whisk eggs separately until combined and add to the mushroom mixture. Stir in 1/2 cup (60 g) panko crumbs, spring onions, Old Bay seasoning, chopped parsley, Worcestershire sauce, lemon juice, salt, and pepper. Mix well to form a cohesive mixture.
- Step 5: Freeze for Structure: Shape the mixture into cakes, wrap tightly in plastic wrap to prevent freezer burn, and freeze. Freezing helps the cakes hold their shape during cooking. Chill time can vary from a few hours to overnight depending on firmness desired.
- Step 6: Create a Breading Station: Set up three shallow dishes—one with 1/4 cup (30 g) flour, one with 2 tablespoons (15 g) flour, and one with 1 1/2 cups (180 g) panko crumbs. Dredge each cake first in flour, then in beaten egg if reserved, and finally coat with panko crumbs for a crispy exterior.
- Step 7: Fry to Crispy Perfection: Heat 2 tablespoons (30 ml) olive oil in a skillet over medium heat. Cook the breaded cakes for about 3-4 minutes per side until deep golden brown and crispy. Flip halfway through cooking for even browning. If cakes brown too quickly, reduce heat. The internal temperature should reach 165 degrees F for food safety.
- Step 8: Serve with Aioli: Serve the cakes warm, drizzled with prepared aioli or with the sauce on the side. Garnish with lemon wedges if desired.

Notes
- Storage Tips – Room Temperature: Store cakes in an airtight container up to 2 days, avoiding humidity and heat exposure.
- Storage Tips – Refrigeration: Use airtight container, refrigerate at 4 degrees C, and consume within 4 days.
- Storage Tips – Freezing: Individually wrap cakes in plastic wrap, place in freezer bags, and store up to 3 months. Thaw overnight in refrigerator before cooking.
- Expert Tips – If cakes fall apart while frying, refrigerate the shaped cakes for 30 minutes beforehand to help them set.
- Expert Tips – When mixture feels too wet, add an extra 1/4 cup (30 g) of panko crumbs for better shaping.
- Expert Tips – Use a thermometer to confirm doneness; cakes should reach 165 degrees F internally.
- Expert Tips – If aioli is too thick, whisk in 1 tablespoon (15 ml) of water at a time to achieve a drizzle-able consistency.
- Expert Tips – Flip cakes at 2-3 minute intervals to avoid uneven browning.
- Serving Suggestions – Pair with a fresh arugula salad or a quinoa side dish.
- Serving Suggestions – Serve alongside tangy coleslaw for added crunch.
- Serving Suggestions – Add to grain bowls with roasted vegetables or use as gluten-free wrap filling for hand-held bites.
- Serving Suggestions – Top with lemon garlic aioli or drizzle with spicy sriracha sauce for added flavor.
- Recipe Variations – For a vegan option, substitute eggs with vegan egg replacer and mayonnaise with plant-based mayo.
- Recipe Variations – Use gluten-free breadcrumbs in place of panko for gluten-free dietary needs.
- Ingredient Notes – Choose firm, fresh lion’s mane mushrooms with creamy white or beige color for best texture.
- Ingredient Notes – Old Bay seasoning substitutes include a mix of paprika, celery salt, and black pepper.
- Ingredient Notes – Use fresh panko crumbs; stale breadcrumbs negatively affect the texture.
- Ingredient Notes – Fresh Italian parsley adds fresh color and a mild herbal note; dried parsley is not recommended.
Nutrition
- Serving Size: 1 cake
- Calories: 350
- Sugar: 1g
- Sodium: 600mg
- Fat: 20g
- Saturated Fat: 7g
- Unsaturated Fat: 10g
- Trans Fat: 0g
- Carbohydrates: 15g
- Fiber: 1g
- Protein: 30g
- Cholesterol: 90mg
Ingredient Notes
- Pasta: Go for a high-quality spaghetti or fettuccine made from durum wheat. Fresh pasta cooks faster and gives a lovely texture, but dried works well too.
- Miso paste: Use white miso for a subtle sweetness that complements the mushrooms. Check for ingredients without additives to get the best flavor punch.
- Mushrooms: I prefer cremini or shiitake for their earthy taste. Make sure they’re firm and not slimy, freshness really impacts the overall dish.
- Heavy cream: A good quality heavy cream adds luxurious creaminess. Choose one that’s sold in a sealed container, and make sure it’s fresh for the best results.
- Garlic: Fresh garlic works best; avoid the pre-minced stuff which can taste bland. A sharp knife gives you better control when chopping for an even texture.
- Parmesan cheese: Grate fresh Parmesan instead of using pre-grated for extra creaminess and a richer flavor. Look for aged cheese for added complexity.
- Olive oil: Opt for a fruity extra virgin olive oil to enhance the pasta dish. The quality matters here; a great oil makes a noticeable difference in flavor.
Recipe Tips
- If mushrooms are browning too slowly, increase heat slightly every 5 minutes until they achieve a deep brown color, which usually takes about 10-15 minutes.
- When adding onion and garlic, sauté until onions become translucent, taking about 3-4 minutes, to ensure they contribute good flavor without burning.
- If your miso mixture is lumpy, whisk thoroughly with a fork until mostly smooth before adding to the pasta, ensuring an even flavor distribution.
- For pasta that is cooking unevenly, stir occasionally throughout the 9-11 minutes of cooking to achieve consistent doneness and prevent sticking.
- If the pasta seems dry after adding coconut milk and cheeses, add a splash of broth or water, mixing well to create a creamy consistency.
Serving Suggestions
Serve creamy miso mushroom pasta alongside steamed asparagus or sautéed greens for a satisfying meal. A side of garlic roasted Brussels sprouts adds more flavor and texture.
Use to make a creamy miso mushroom risotto or a comforting pasta bake with added vegetables. Add to a simple vegetable stir-fry for a quick dinner option.
Top with a sprinkle of fresh parsley or a drizzle of extra coconut milk for added creaminess. You can also finish with a dash of red pepper flakes for a touch of heat.
Recipe variations
- You can use different mushroom varieties like cremini, button, or portobello instead of shiitake to adjust the flavor and texture of the miso mushroom pasta.
- Add 2 tablespoons of tamari sauce along with the miso paste and ½ cup cool water to deepen the umami taste and provide a subtle saltiness to the sauce.
- Either chicken broth or vegetable broth can be used for cooking the pasta, offering a non-vegetarian or vegetarian option that fits your preference in the one-pot preparation.
- If making more servings, double the recipe by using 2 pounds of pasta, 8 cups of broth, and 4 tablespoons miso paste; adjust cooking time to maintain proper texture.
Save This Recipe!
How to Store?
To keep your creamy miso mushroom pasta fresh and delicious, follow these storage tips:
Room Temperature: Store in an airtight container at room temperature for up to 2 days. Keep it covered to prevent drying.
Refrigeration: Place in an airtight container and refrigerate up to 5 days. Reheat gently on the stove or microwave with a splash of broth.
Freezing: Transfer to a freezer-safe container, freeze up to 2 months. Thaw overnight in the fridge before reheating slowly.
Other Recipes You’ll Love
If you enjoyed this miso mushroom pasta or any other recipe on my blog, please leave a ⭐ star rating and let me know how it went in the comments below. I appreciate taking time to read about this recipe, thank you!