
If you’ve been searching for a Gluten Free Sandwich Bread that won’t disappoint, you’re in the right spot. Making gluten-free bread can sometimes feel tricky, especially with so many options out there.
This recipe addresses crumbly, dry, and dense gluten free bread, poor slice stability, and rapid drying, giving slices that hold sandwiches without crumbling.
I know how hard it can be to find a bread recipe that’s both gluten-free and tasty. It’s frustrating when you just want a soft, fluffy slice to enjoy your favorite sandwich. This recipe solves that problem, giving you lighter bread without the worry of gluten.
What makes this recipe so great is how simple it is! With just a few ingredients and about an hour, you can have warm, homemade bread ready to slice. Plus, it’s dependable every time, as long as you follow the tips for activating the yeast with warm water.
If you want to take your baking a step further, you can whip up some sweet treats too. If you enjoy baking, check out this Blueberry Lemon Zucchini Bread for a tasty twist!
Table of contents
Why You Will Love This Recipe
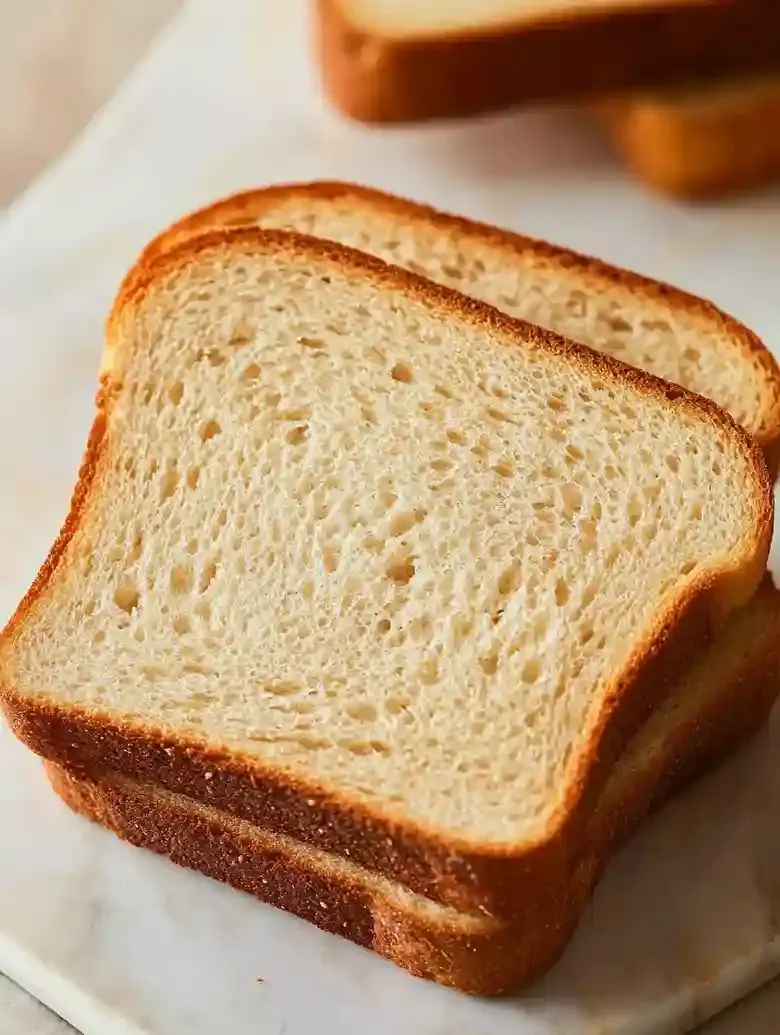
- Soft and Fluffy Texture : This bread has that ideal soft and fluffy feel, making it a great base for sandwiches without the heaviness that often comes with gluten-free options.
- Enjoyable Flavor : With a slight sweetness and moistness, it’s simply satisfying to eat. You won’t miss traditional bread when you give this a try.
- Convenient to Make : The recipe simplifies things, so you won’t be stuck in the kitchen for hours. You can have fresh bread ready without a complicated process.
- Easy Storage : Just pop any leftovers into an airtight container at room temp, and they’ll stay fresh. It’s hassle-free and keeps well when you don’t slice it up in advance.
Satisfying Gluten Free Sandwich Bread
- Prep Time: 34 minutes
- Cool Time: 0 minutes
- Cook Time: 30 minutes
- Total Time: 1 hour 4 minutes
- Yield: 16 servings 1x
- Category: Bakery
- Method: Baking
- Cuisine: Gluten Free
- Diet: Gluten Free
Description
This easy gluten-free bread recipe yields a delicious loaf perfect for sandwiches or toast.
Ingredients
- 2 1/2 cups (300g) all-purpose gluten-free flour, measure-for-measure flour with xanthan gum
- 11/2 teaspoon (5g) xanthan gum, acts as a binder
- 11/2 teaspoon (5g) gluten-free baking powder, check for gluten-free certification
- 1 packet (2 1/41/2 teaspoons) rapid rise/instant yeast, ensure it is fresh
- 1/4 cup (60ml) extra virgin olive oil, high-quality for best flavor
- 1/4 cup (85g) honey, can substitute with agave nectar or maple syrup
- 11/2 teaspoon (5ml) apple cider vinegar, adds tanginess and helps with rising
- 1 1/2 cups (360ml) warm water, between 100-110 degrees F
- 3 egg whites (from large eggs), at room temperature
- 11/2 teaspoon (5g) salt
Instructions
- Mix Your Wet Ingredients: In a bowl, whisk together the warm water, honey, olive oil, apple cider vinegar, and egg whites until well blended. Ensure the mixture is smooth without lumps. The aroma will be inviting, indicating it is ready.
- Combine Dry Ingredients Next: In a separate bowl, whisk together the all-purpose gluten-free flour, xanthan gum, baking powder, and salt until uniform. This step is crucial to avoid uneven rising in your bread.
- Blend Wet and Dry Ingredients: Pour the wet mixture into the dry ingredients, stirring gently until just combined. The dough should feel slightly sticky. Do not over-mix to keep the loaf light and airy.
- Let the Dough Rise: Cover the bowl with a damp cloth and place it in a warm location. Allow it to rise until it doubles in size, usually about an hour, and a pleasant yeasty aroma should be noticeable. Avoid letting it sit too long to prevent collapse.
- Shape & Transfer to Pan: Gently scoop the risen dough into the prepared loaf pan, smoothing the top evenly. Pack it without pressing hard to maintain the dough’s structure.
- Bake Time!: Place the loaf in the oven and bake until it turns golden brown and sounds hollow when tapped, roughly 30 minutes. The tempting smell will start around eight minutes, but avoid opening the oven.
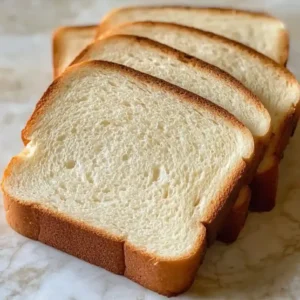
- Cool & Slice It Up: Once baked, cool the loaf in the pan for a few minutes before transferring it to a wire rack to cool completely. Use a serrated knife for slicing to prevent squishing the bread.
Notes
- Storage Tips: Store leftover bread in an airtight container at room temperature. Best if not pre-sliced for storage.
- Expert Tips: Bread rises best in a warm location; consider using a proofing mode if available. A 9-inch x 4-inch Pullman loaf pan yields the best results with a nicely shaped loaf that is easy to slice. For accurate flour measures, use the ‘spoon & level’ method to avoid packed flour. If the dough has not doubled in size, resist the urge to bake early to prevent dense bread. Slice with a serrated knife for clean cuts and to avoid squishing your loaf.
- Reheating Instructions: To reheat, wrap the bread in aluminum foil and heat in a 350 degrees F oven for about 10 minutes or until warmed through.
- Serving Suggestions: Serve as toast with jam or butter. Pair with soups or salads for lunch. Use slices for sandwiches, with fillings like turkey or fresh vegetables.
- Recipe Variations: Add herbs like rosemary for an aromatic twist. Incorporate seeds such as chia or flax for added nutrition. Substitute different oils, like avocado oil, to vary the flavor profile.
- Ingredient Notes: Choose a good quality all-purpose gluten-free flour for the best texture. If needed, you can omit xanthan gum if using flour that includes it. Verify that your baking powder is gluten-free; some brands may contain gluten.
Nutrition
- Serving Size: 1 slice
- Calories: 114
- Sugar: 5g
- Sodium: 189mg
- Fat: 4g
- Saturated Fat: 0.5g
- Unsaturated Fat: 0g
- Trans Fat: 0g
- Carbohydrates: 18g
- Fiber: 2g
- Protein: 3g

Ingredient Notes
- All-purpose gluten-free flour: Grab a good measure-for-measure flour with xanthan gum. It helps the bread stay together and have that nice, fluffy texture.
- Xanthan gum: This little guy’s a game changer for gluten-free baking! It acts as a binder, making sure your bread has the right structure. Just a teaspoon does the trick!
- Gluten-free baking powder: You need baking powder for the right lift. Double-check it’s gluten-free; some regular ones aren’t. Opt for a trusted brand!
- Rapid rise/instant yeast: Using this type of yeast speeds up the rising process, which is super handy! Just make sure it’s fresh for the best results.
- Extra virgin olive oil: This olive oil adds moisture and a hint of flavor. Look for a good quality bottle; you’ll taste the difference in your bread.
- Honey: It sweetens the bread slightly and creates a soft texture. If you need a swap, agave nectar or maple syrup works just as well!
- Apple cider vinegar: This adds just a touch of tanginess and helps with rising. It’s easy to find, and you probably already have some in your pantry!
- Warm water: The water needs to be cozy, around 100-110°F, to activate the yeast. You can use a thermometer or a quick touch test to check.
- Egg whites: Three large egg whites give the bread nice structure without added fats. Make sure they’re at room temperature for the best rise!
Recipe Tips
- If you’re wondering about the best way to let your bread rise, a warm area works wonders; consider using a proofing mode if you have one.
- When choosing your pan, a 9″x4″ Pullman loaf pan yields great results, creating a nicely shaped loaf that’s easy to slice.
- For accurate flour measures, try the ‘spoon & level’ method to avoid packing too much flour into your measuring cup.
- If your dough hasn’t doubled in size, resist the urge to bake it too soon to avoid ending up with dense bread.
- Using a serrated knife for slicing will help you get clean cuts and prevent squishing your delicious gluten free sandwich bread.
Serving Suggestions
Recipe variations
- You can use almond flour or coconut flour instead of all-purpose gluten-free flour for a different texture and flavor in your gluten-free sandwich bread.
- Add 1 tablespoon of dried rosemary or 1 tablespoon of garlic powder to the dry ingredients for a savory kick when making your bread.
- Either substitute honey with 1/4 cup of agave nectar or use 1/4 cup of maple syrup for a sweet alternative in the recipe.
- If you want to scale your recipe, you can double all ingredients to make two loaves or halve them for a smaller batch.
Save This Recipe!
How to Store?
To keep your gluten free sandwich bread fresh, follow these storage tips:
Room Temperature: Place the bread in an airtight container and store at room temperature for up to 2 days.
Refrigeration: For longer storage, store in an airtight container in the refrigerator for up to 1 week.
Freezing: Wrap the bread tightly in plastic wrap or aluminum foil, then place in a freezer bag. Freeze for up to 3 months. Thaw at room temperature before serving.
Other Recipes You’ll Love
If you enjoyed this Gluten Free Sandwich Bread or any other recipe on my blog, please leave a ⭐ star rating and let me know how it went in the comments below. I appreciate taking time to read about this recipe, thank you!