
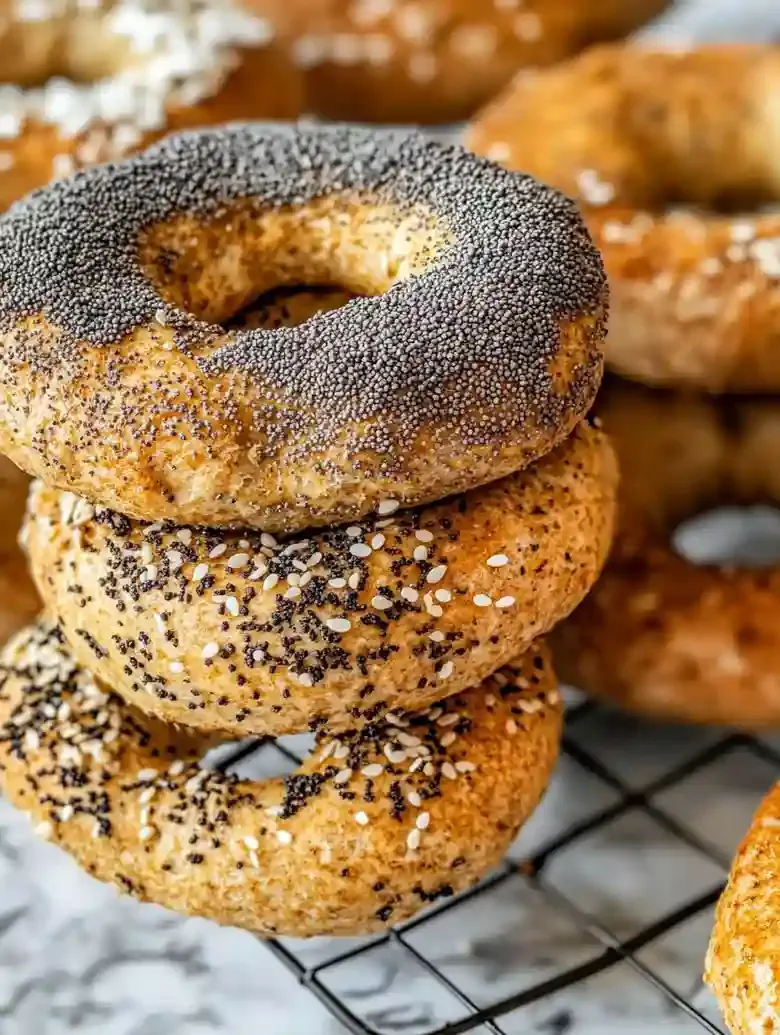
I’m excited to share my gluten free bagels recipe with you today! These bagels are chewy and flavorful, and you won’t believe how easy they are to make. If you’ve missed enjoying bagels because of dietary restrictions, you’re in for a treat!
This recipe fixes crumbly gluten-free bagels, dense texture, sticky dough, and long rising times by guiding hydration, kneading, shaping, and oven steam for chew.
I know how hard it can be to find gluten-free options that don’t taste like cardboard. This recipe solves that problem by using simple ingredients, plus it’s super easy to follow. With this recipe, I can whip up a batch of bagels that my whole family can enjoy, which is a win in my book.
Making these bagels only takes about two and a half hours total, including cooking time. With prep and cooking combined, you’ll have fresh, warm bagels ready to munch on for breakfast or brunch. You’ll love how they come out chewy with just the right hint of sweetness, giving you that perfect bagel texture.
If you want to try out more delicious baked goods, I highly recommend checking out this Bialys recipe. If you’ve got a craving for something tasty, you won’t be disappointed!
Table of contents
Why You Will Love This Recipe
- Chewy Texture : Thanks to the psyllium husk, these bagels have a satisfying chewiness that’ll remind you of traditional bagels, just without the gluten.
- Flavorful Profile : With hints of sweetness and earthiness from the base ingredients, they’re savory and toasty, making them a hit for any bagel lover.
- Convenient Storage : These bagels stay fresh at room temperature for a couple of days, and you can easily freeze them for later munching.
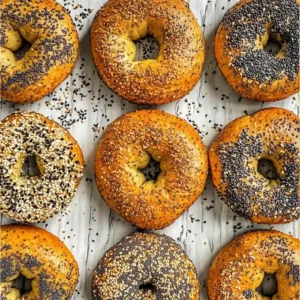
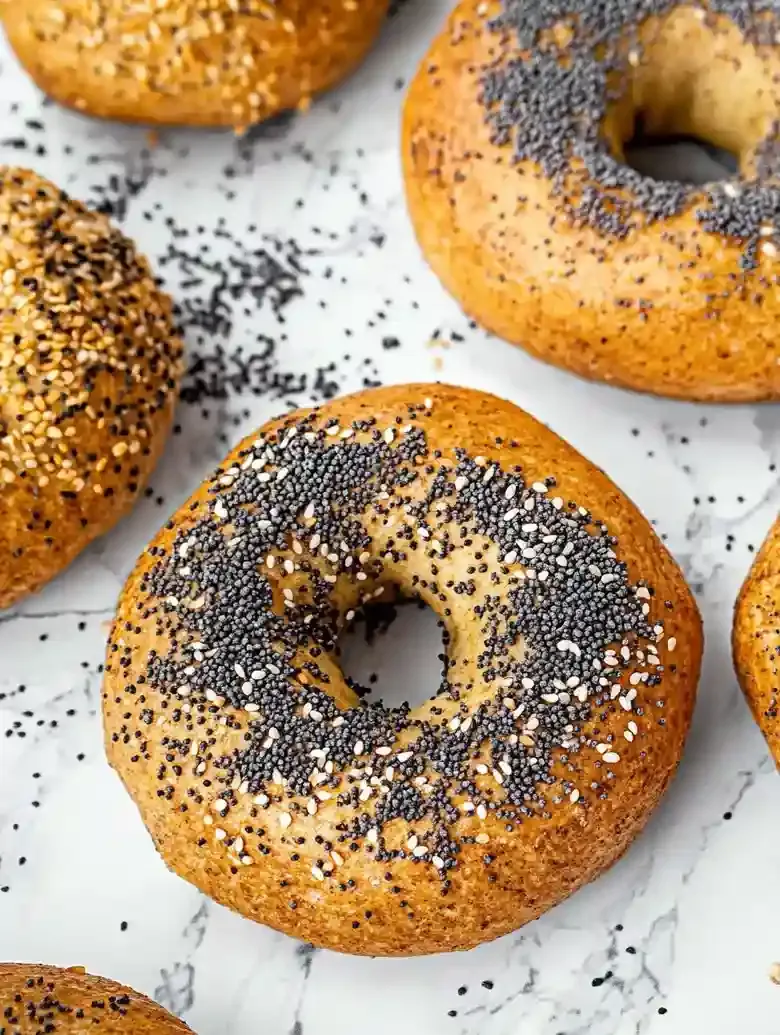
- Customizable Toppings : From everything seasoning to sesame seeds, you can easily switch up the toppings based on your mood or occasion.
Homemade Gluten Free Bagels Recipe
- Prep Time: 120 minutes
- Cool Time:
- Cook Time: 30 minutes
- Total Time: 150 minutes
- Yield: 8 bagels 1x
- Method: Baking
- Diet: Gluten Free
Description
Delicious gluten-free bagels that are chewy and perfect for any toppings.
Ingredients
- 2 cups warm water (480 ml)
- 1/4 cup whole psyllium husk (25 g)
- 2 tablespoons maple syrup or agave syrup (30 ml)
- 2 tablespoons olive oil (30 ml)
- 21/2 teaspoons instant yeast (6 g)
- 1/2 cup tapioca starch (60 g)
- 1/2 cup cornstarch (60 g)
- 1 cup whole grain rice flour (150 g)
- 1/2 cup corn flour (60 g)
- 1 cup + 2 tablespoons sorghum flour or buckwheat flour (140 g)
- 21/2 teaspoons salt (10 g)
- 1 tablespoon baking soda (4 g)
- Sesame seeds
- poppy seeds
- everything bagel seasoning
- coarse salt
Instructions
- Prepare the Yeast Mixture: Start by dissolving the yeast in warm water. You will know it is ready when it starts to foam and bubble, which usually takes a few minutes. This step is crucial because it activates the yeast, ensuring your bagels rise properly. Keep an eye on the temperature—too hot can kill the yeast.
- Mix the Dry Ingredients: Combine your gluten-free flour with any other dry ingredients. Stir until everything is well blended; it should look like coarse sand. This step helps prevent clumping, ensuring an even texture throughout your bagels. Avoid any substitutions that might alter the final result.
- Add the Wet Ingredients: Pour in your yeast mixture along with all other wet ingredients. As you mix, aim for a dough that is soft but not overly sticky. If it is too wet, it might not hold shape. Stick with your proportions—changing them could lead to bagels that lose their charm.
- Knead & Shape the Dough: On a floured surface (use more gluten-free flour), gently knead the dough until it is well combined. You want it to feel smooth and slightly elastic, which is key for that chewy texture. Avoid over-kneading, which can create a dense bagel instead of one that is airy.
- Let It Rise: Place the dough in a warm area and cover it to let it rise until it doubles in size. This typically takes about one hour. You will know it is ready when it feels puffed up and light. Do not rush this step; it is important for achieving that classic bagel texture.
- Boil & Bake the Bagels: Bring a large pot of water with baking soda to a gentle boil. Add bagels carefully, allowing them to cook for one minute on each side. This gives your bagels that chewy crust. Avoid overcrowding the pot to ensure even boiling without sticking together.
- Cool & Enjoy!: Once baked, allow your bagels to cool on a wire rack. They should have a golden brown hue and a delicious smell. This cooling time is key since it helps them set properly. Resist the urge to slice too soon, or they might get squished!
Notes
- Storage Tips: Store at room temperature for 1-2 days; refrigerate for up to 5 days; freeze for up to 3 months.
- Expert Tips: Do not make any substitutions, as they will affect texture and taste. Use a kitchen scale for ingredient accuracy. Experiment with different toppings to customize your bagels.
- Reheating Instructions: For reheating, toast the bagels lightly until warmed through.
- Serving Suggestions: Serve toasted with vegan cream cheese and dill. Pair with carrot lox for a delicious brunch. Enjoy as a sandwich with your favorite fillings.
- Recipe Variations: Add dried herbs to the dough for extra flavor. Incorporate seeds into the dough for added texture. Top with grated vegan cheese for a cheesy flavor.
- Ingredient Notes: Select a good quality whole grain rice flour for the best outcome. If in a pinch, cornstarch can be swapped with potato starch. Use finely milled corn flour for better integration into the mix.
Nutrition
- Calories: 297
- Sugar: 4g
- Sodium: 1000mg
- Fat: 5g
- Saturated Fat: 1g
- Unsaturated Fat: 4g
- Trans Fat: 0g
- Carbohydrates: 59g
- Fiber: 9g
- Protein: 5g
- Cholesterol: 0mg
Ingredient Notes
- Warm water: This helps activate the yeast and get the dough going. Just make sure it’s warm, not too hot or cold, for the best results.
- Psyllium husk: It works as a binder for your bagels, giving them that nice chewy texture. Just grab the whole husk for this recipe!
- Maple syrup or agave syrup: A touch of sweetness balances the flavors and helps with browning. Either one works, so choose your favorite.
- Olive oil: This adds moisture to the dough and a bit of richness too. Extra virgin’s great if you want a nice flavor.
- Instant yeast: This is your secret weapon for fluffy bagels. Make sure it’s fresh for the best rise, and no need to activate it first!
- Tapioca starch: It gives the bagels that chewy bite. You’ll want the fine kind for better texture, so leave the coarse stuff behind.
- Cornstarch: This helps with the lightness of your bagels. If you’re in a pinch, you could swap in potato starch if you have it.
- Whole grain rice flour: It adds a subtle earthy flavor and helps with structure. Grab a good quality one for the best outcome.
- Corn flour: This adds a lovely flavor and texture to the dough. Just make sure it’s finely milled to blend well in the mix.
- Sorghum flour or buckwheat flour: Either works great for adding body and nutrition. I prefer sorghum for a milder taste, but buckwheat’s a fun twist!
- Baking soda: This helps with the rise and gives that nice bagel crust. Just a small amount goes a long way here!
- Semi-coarse toppings: Sesame seeds, poppy seeds, or everything bagel seasoning work well for flavor and crunch. Feel free to get creative with your favorites!
Recipe Tips
- If the bagels turn out too dense, testing your yeast by dissolving it in warm water with a pinch of sugar can confirm its effectiveness.
- When shaping the bagels, ensuring they are well-formed and stretched can help them retain their shape during baking.
- For bagels lacking chewiness, double-check that you’re using the correct flour blend and don’t skip the boiling with baking soda.
- If you want more precision, weighing your ingredients with a kitchen scale will give you accurate measurements for the best results.
- When trying out new toppings, experimenting can reveal delicious combinations to make your gluten-free bagels even more enjoyable.
Serving Suggestions
Serve toasted with vegan cream cheese and dill for a satisfying breakfast. Pair these gluten free bagels with carrot lox for an enjoyable brunch option.
Use them as a base for sandwiches filled with your favorite ingredients. You can enjoy these bagels as a hearty snack any time of day.
Top with plant-based spreads or dressings for additional flavor. Experiment with different spreads to customize your bagel experience.
Recipe variations
- You can use ½ cup almond flour instead of whole grain rice flour for a different texture.
- Add 1 tablespoon dried oregano or 1 tablespoon dried basil to the dough for an herbaceous flair.
- Either top with sunflower seeds or flaxseeds for crunch, or use everything bagel seasoning for extra flavor.
- If you’re making a larger batch, use 4 cups of water, 50 g of psyllium husk, and double the other ingredients accordingly.
Save This Recipe!
How to Store?
To keep your gluten free bagels fresh, follow these storage tips:
Room Temperature: Place bagels in an airtight container at room temperature for up to 2 days. This method helps retain freshness.
Refrigeration: Store bagels in an airtight container in the refrigerator for up to 5 days. This helps prolong their quality.
Freezing: Wrap each bagel in plastic wrap, then place in a freezer bag. Freeze for up to 3 months. Thaw in the refrigerator overnight before serving.
Other Recipes You’ll Love
- Mushroom Toast
- French Onion Pull-Apart Bread
- Caramelized Onion Grilled Cheese
- Raspberry Brie Focaccia
If you enjoyed this gluten free bagels or any other recipe on my blog, please leave a ⭐ star rating and let me know how it went in the comments below. I appreciate taking time to read about this recipe, thank you!