
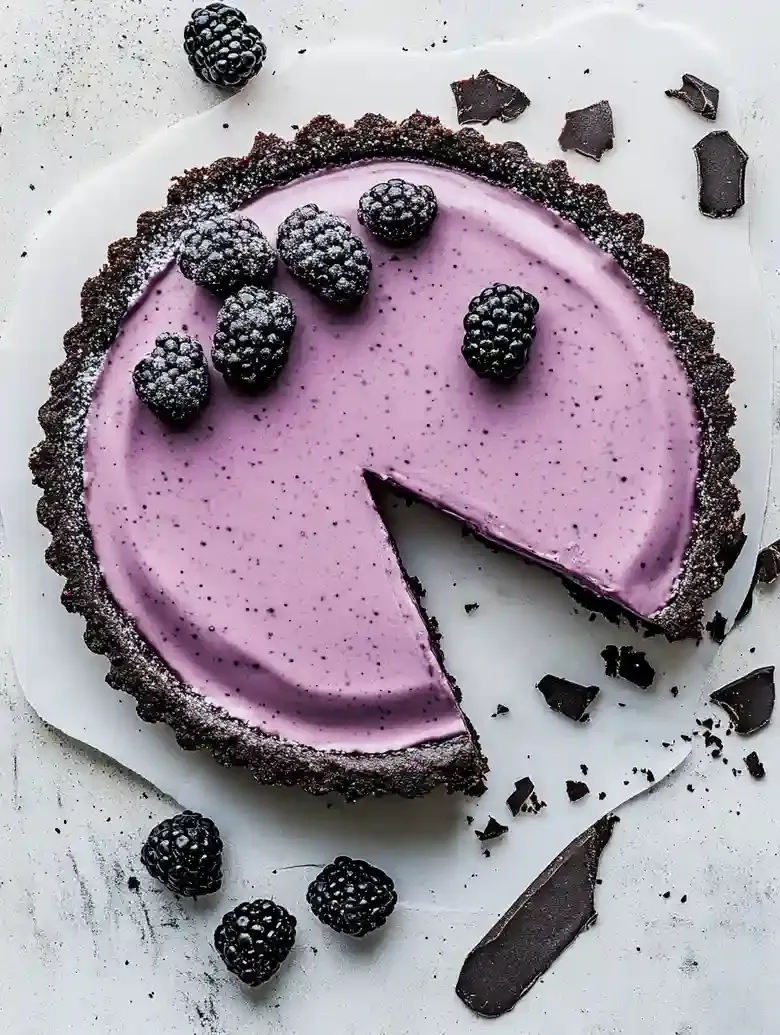
If you’re looking for a quick and tasty dessert, blackberry oreo tart is just the thing. With a rich chocolate crust and creamy blackberry filling, it’s the perfect way to impress friends or family with minimal effort.
This blackberry oreo tart recipe solves common crust crumbling and runny filling problems while providing simple steps for a stable, creamy dessert with fresh fruit flavor.
I’ve struggled with tarts in the past; the crust would crumble, or the filling would be too runny. But I’ve found a way to tackle those issues, which is why I can’t wait to share this recipe.
This tart comes together fast, just 15 minutes of prep and an hour in the fridge to chill. Plus, it gives a fresh twist on traditional tarts that everyone will love. If you want a fruity option, make sure to check out my Rhubarb and Strawberry Tart Recipe!
Table of contents
Dietary Considerations
- This recipe is not gluten-free due to the use of Oreos, which contain wheat flour in their ingredients.
- The recipe contains butter and cream cheese, making it unsuitable for dairy-free and vegan diets.
- This recipe is not keto or low-carb because Oreos and sugar contribute a significant amount of carbohydrates.
- The recipe is vegetarian as it contains no meat or animal-derived gelatin.
- This recipe is nut-free since none of the ingredients include nuts or nut-based products.
Why You Will Love This Recipe
- Unique Flavor Combination The tart brings together a rich chocolate crust and a creamy blackberry filling, offering a delightful interplay of sweet and tart flavors that’ll have your taste buds dancing.
- Easy to Make With just 15 minutes of prep, you can whip up this treat in no time. Plus, the chilling time allows you to relax while it sets!
- Seasonal Enjoyment This dessert showcases fresh blackberries, making it a wonderful choice for summer gatherings, bringing a burst of seasonal sweetness to your table.
- Light and Creamy Texture The whipped cream mixed into the filling adds a lovely lightness, making each slice smooth and airy, without feeling heavy or overly rich.

How to Make Blackberry Oreo Tart
- Prep Time: 15 minutes
- Cool Time: 1 hour
- Cook Time: 0 minutes
- Total Time: 1 hour 15 minutes
- Yield: 8 servings 1x
- Category: dessert
- Method: no-bake
- Diet: vegetarian
Description
A no-bake dessert featuring a chocolate crust and creamy blackberry filling that sets firmly after chilling.
Ingredients
- 3 cups (about 270 g) chocolate sandwich cookies (classic Oreos recommended)
- 5 tablespoons (70 g) unsalted butter, melted
- 12 oz (340 g) Driscoll’s fresh blackberries
- 1 tablespoon (21 g) honey
- 1 tablespoon (approx. 10 g) plain gelatin
- 1 cup (240 ml) heavy whipping cream
- ⅓ cup (110 g) sweetened condensed milk
Instructions
- Step 1: In a large bowl, combine the chocolate sandwich cookie crumbs with the melted butter. Mix thoroughly until crumbs are fully coated and hold together when pressed. Press this mixture firmly and evenly into the bottom and sides of a 10-inch tart pan by hand to form the crust. Place the tart pan in the freezer to chill while you prepare the filling.

- Step 2: Place the blackberries in a blender and process until smooth. Strain the puree through a mesh sieve to remove all seeds, discarding the seeds afterwards. Stir the honey into the strained blackberry puree. Add the plain gelatin and stir to combine. Let the mixture rest for 5 minutes to allow the gelatin to bloom. Then microwave this mixture for 30 seconds and stir gently until the gelatin dissolves completely and the mixture is smooth.
- Step 3: In a large bowl, whip the heavy whipping cream with a whisk or hand mixer until soft peaks form, approximately 3 to 4 minutes. This means the cream holds a gentle peak when the whisk is lifted but is not stiff.
- Step 4: Drizzle the sweetened condensed milk evenly over the whipped cream. Then pour the melted blackberry gelatin puree over the top. Using a spatula, gently fold all ingredients together until the mixture is uniform in color, taking care not to deflate the whipped cream.
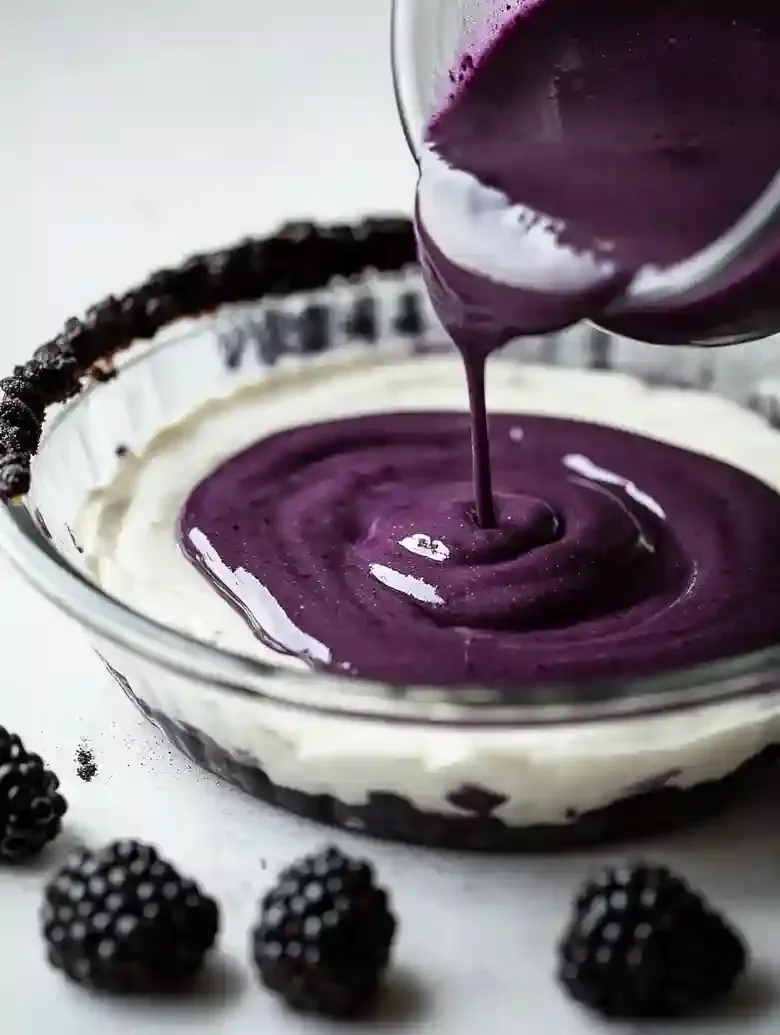
- Step 5: Scoop the blackberry cream mixture into the prepared crust, smoothing the surface evenly with a spatula. Cover the tart and refrigerate for at least 1 hour to allow the filling to set.
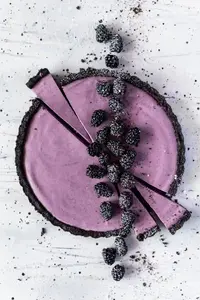
- Step 6: Once chilled, slice the tart and serve. Optionally, garnish with fresh blackberries or additional whipped cream before serving.
Notes
- Room Temperature: Store the tart in an airtight container at room temperature for up to 2 days without refrigeration.
- Refrigeration: Keep the tart in an airtight container in the refrigerator for up to 7 days. Chill before serving.
- Freezing: Wrap tightly in plastic wrap and place in a freezer-safe container. Freeze for up to 2 months. Thaw overnight in the refrigerator before serving.
- If the cookie crust crumbles easily, add an extra tablespoon of melted butter before pressing into the tart pan for better binding.
- If the blackberry puree does not set properly, allow it to rest another 5 minutes before microwaving again for 30 seconds and stirring gently.
- If the whipped cream does not reach soft peaks, continue whipping for another minute until the desired texture forms.
- To reduce sweetness, decrease sweetened condensed milk by 1 tablespoon.
- If gelatin does not fully dissolve, gently reheat the mixture for an additional 10 seconds, stirring until smooth.
- Garnish with fresh blackberries or a dollop of whipped cream per slice.
- Serve alongside vanilla ice cream or a side of fresh fruit salad or mint leaves.
- Add to dessert trays with chocolate mousse or berry pavlova.
- Use tart slices as accompaniments to yogurt parfaits or berry granola cups.
- Sprinkle crushed cookie crumbs or drizzle chocolate sauce on top for extra presentation appeal.
- Use fresh, plump blackberries with deep color and slight shine for optimal natural sweetness and tartness.
- Classic chocolate sandwich cookies (Oreos) provide a firm, chocolatey base ideal for tart crusts.
- Unsalted butter should be melted and preferably softened before mixing to ensure an even crust texture.
Nutrition
- Serving Size: 1 slice
- Calories: 350
- Sugar: 1g
- Sodium: 600mg
- Fat: 20g
- Saturated Fat: 7g
- Unsaturated Fat: 10g
- Trans Fat: 0g
- Carbohydrates: 15g
- Fiber: 1g
- Protein: 30g
- Cholesterol: 90mg
Ingredient Notes
- Blackberries: Choose fresh, plump blackberries with a deep color and slight shine. They add natural sweetness and tartness, crucial for balancing the rich Oreo flavor.
- Oreos: I recommend using classic Oreos for the crust. Their chocolatey taste and crisp texture provide the ideal base that complements the soft filling.
- Butter: Use unsalted butter for making the crust. It adds richness and supports the desired texture. Make sure it’s softened for easy mixing.
- cream cheese: Choose full-fat cream cheese for a smooth, rich filling. It’s key to developing a creamy texture, making every bite satisfying.
- Sugar: Granulated sugar is what you’ll need for the filling. It sweetens the cream cheese and balances the acidity of the blackberries beautifully.
- Vanilla extract: Go for pure vanilla extract. It enhances the overall flavor, ensuring a warm, inviting background to the rich filling.
- Cornstarch: Using cornstarch helps thicken the blackberry mixture for a nice consistency. Look for a fine powder to avoid clumps in your filling.
Recipe Tips
- If your cookie crust crumbles easily, add an extra tablespoon of melted butter before pressing it into the tart pan.
- When you notice your blackberry puree hasn’t set well, let it rest for an additional 5 minutes before microwaving for 30 seconds.
- If your whipped cream doesn’t form soft peaks, beat it for another minute until it reaches the desired texture.
- For an overly sweet filling, reduce the sweetened condensed milk by 1 tablespoon to achieve a better flavor balance.
- If gelatin doesn’t dissolve completely, gently reheat the mixture for an additional 10 seconds, stirring until smooth.
Serving Suggestions
Serve with fresh whipped cream or a scoop of vanilla ice cream. A side of fruit salad or mint leaves complements the tart well.
Add to dessert trays featuring chocolate mousse or berry pavlova. Use slices as an accompaniment with yogurt parfaits or berry granola cups.
Top with chocolate drizzle or extra blackberries for garnish. A sprinkle of crushed cookies enhances the presentation of each serving.
Recipe variations
- You can use raspberries or strawberries instead of blackberries to create a different berry flavor while keeping the tart’s texture consistent with the original recipe.
- Add 1 teaspoon of vanilla extract to the filling for extra aroma and depth that complements the chocolate cookie crust and enhances the berry puree’s taste.
- Either whole or crushed Oreo cookies can be used for the crust. The crushed version gives a finer texture, while whole Oreo pieces add crunch to the base.
- If using a larger 12-inch tart pan, increase the Oreo crumbs to 4 cups and butter to 6 tablespoons. This adjustment maintains the crust thickness and structural integrity. This blackberry oreo tart pairs well with Blueberry Cruffins for a berry-themed dessert spread.
Save This Recipe!
How to Store?
To keep your blackberry oreo tart fresh and delicious, follow these storage tips:
Room Temperature: Place the blackberry oreo tart in an airtight container at room temperature for up to 2 days without refrigeration.
Refrigeration: Store the tart in an airtight container in the refrigerator for up to 7 days. Chill before serving.
Freezing: Wrap the tart tightly in plastic wrap and place in a freezer container. Freeze up to 2 months. Thaw overnight in fridge.
Other Recipes You’ll Love
- Toasted Coconut Marshmallows
- Puff Pastry Apple Rosettes
- Rhubarb and Strawberry Tart Recipe
- Chocolate Peanut Clusters
If you enjoyed this Blackberry Oreo Tart or any other recipe on my blog, please leave a ⭐ star rating and let me know how it went in the comments below. I appreciate taking time to read about this recipe, thank you!